What is a Krasinski Torte?
There’s a café in San Francisco in Hayes Valley called 20th Century Cafe that serves, among other things, fantastic cakes inspired by things you’d find in a Viennese Kaffeehaus. One of the items, a Krasinski Torte (listed on the menu as a Russian Honey Cake), gained some fame because it is delicious and also because Samin Nosrat (writer for the New York Times, author of Salt, Fat, Acid, Heat) wrote an article on its virtues. Nosrat loved the cake so much that she visited 20th Century Cafe repeatedly until she got the secrets to the recipe and adapted it for a recipe in NYT Cooking.
This cake is called a Krasinski Torte because when 20th Century Cafe was first starting it launched a kickstarter to fund the effort. One of the bigger pledges came from Nicole Krasinski of State Bird Provisions and so Michelle Polzine (owner and founder of 20th Century Cafe) named the cake after her. Here’s a good chowhound article that describes the cake in some detail.
If you look for “Russian Honey Cake” online you’re more likely to run into the Medovik Tort (an example) but that version has different flavors and uses a different technique that involves a batter though the cream filling is similar. The technique of using a double broiler for a spreadable batter is much closer to the Czech version, a Medovník (example), and the use of dulce de leche in the Krasinski Torte is closer to an extension of the condensed milk/caramel filling used in the Medovník.
Influences aside the Krasinski Torte is a true work of art whose open secret, I think, is the burnt honey flavor. It’s instantly recognizable, truly luxurious, and memorably unique. It may be similar to a Medovik or Medovník but if history is fair it should be a famed cake in its own right.
Overview
In concept this Russian Honey Cake is quite simple. “20 layers” sounds impressive or even daunting but it’s really just 10 repetitions of cake and cream. Each cake layer is baked separately which takes time but is a very predictable process. The cream is basically just whipped cream, flavored. Even the construction of the cake is fairly simple and doesn’t require precision (the NYT recipe specifically recommends some imprecision for a more comfortable look).
The only thing this cake requires is time and care. The recommended time is 4 hours which is very comfortable even with only two baking sheets/pans. Optimized, the cake can be made beginning to end in around 3 hours. Highly optimized will take you 2:30. Under 2:30 will generally require more equipment than the average home baker has.
This recipe is very lightly adapted from Samin Nosrat’s recipe in NYT Cooking. It’s pretty much identical, outside of some advice here and there. The real fun is in the optimization part, if you want a fast activity-filled 2.5 – 3 hour bake instead of a relatively comfortable 4 hour bake.
One final warning: the finished cake is just north of 10,000 calories but you should but cutting thin slices (easily serves 20 or more) and every calorie is worth it.
Ingredients
- 18 ounces of wildflower honey, divided into 9 ounce portions.
- 1/4 cup (2 ounces) of water
- 1 cup plus 2 tablespoons (8 ounces) sugar
- 14 tablespoons (7 ounces) butter, cut into small pieces
- 6 large eggs
- 2 1/2 teaspoons baking soda
- 2 1/2 teaspoons Kosher Salt (or 1 1/4 teaspoons fine sea salt), divide into 1 1/2 teaspoon and 1 teaspoon portions.
- 1 teaspoon ground cinnamon
- 3 3/4 cups (16 ounces) all-purpose flour
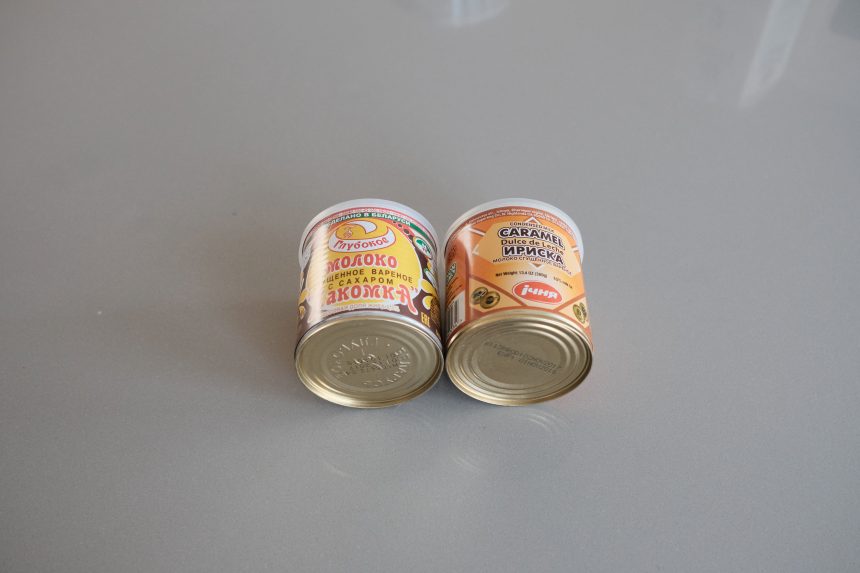
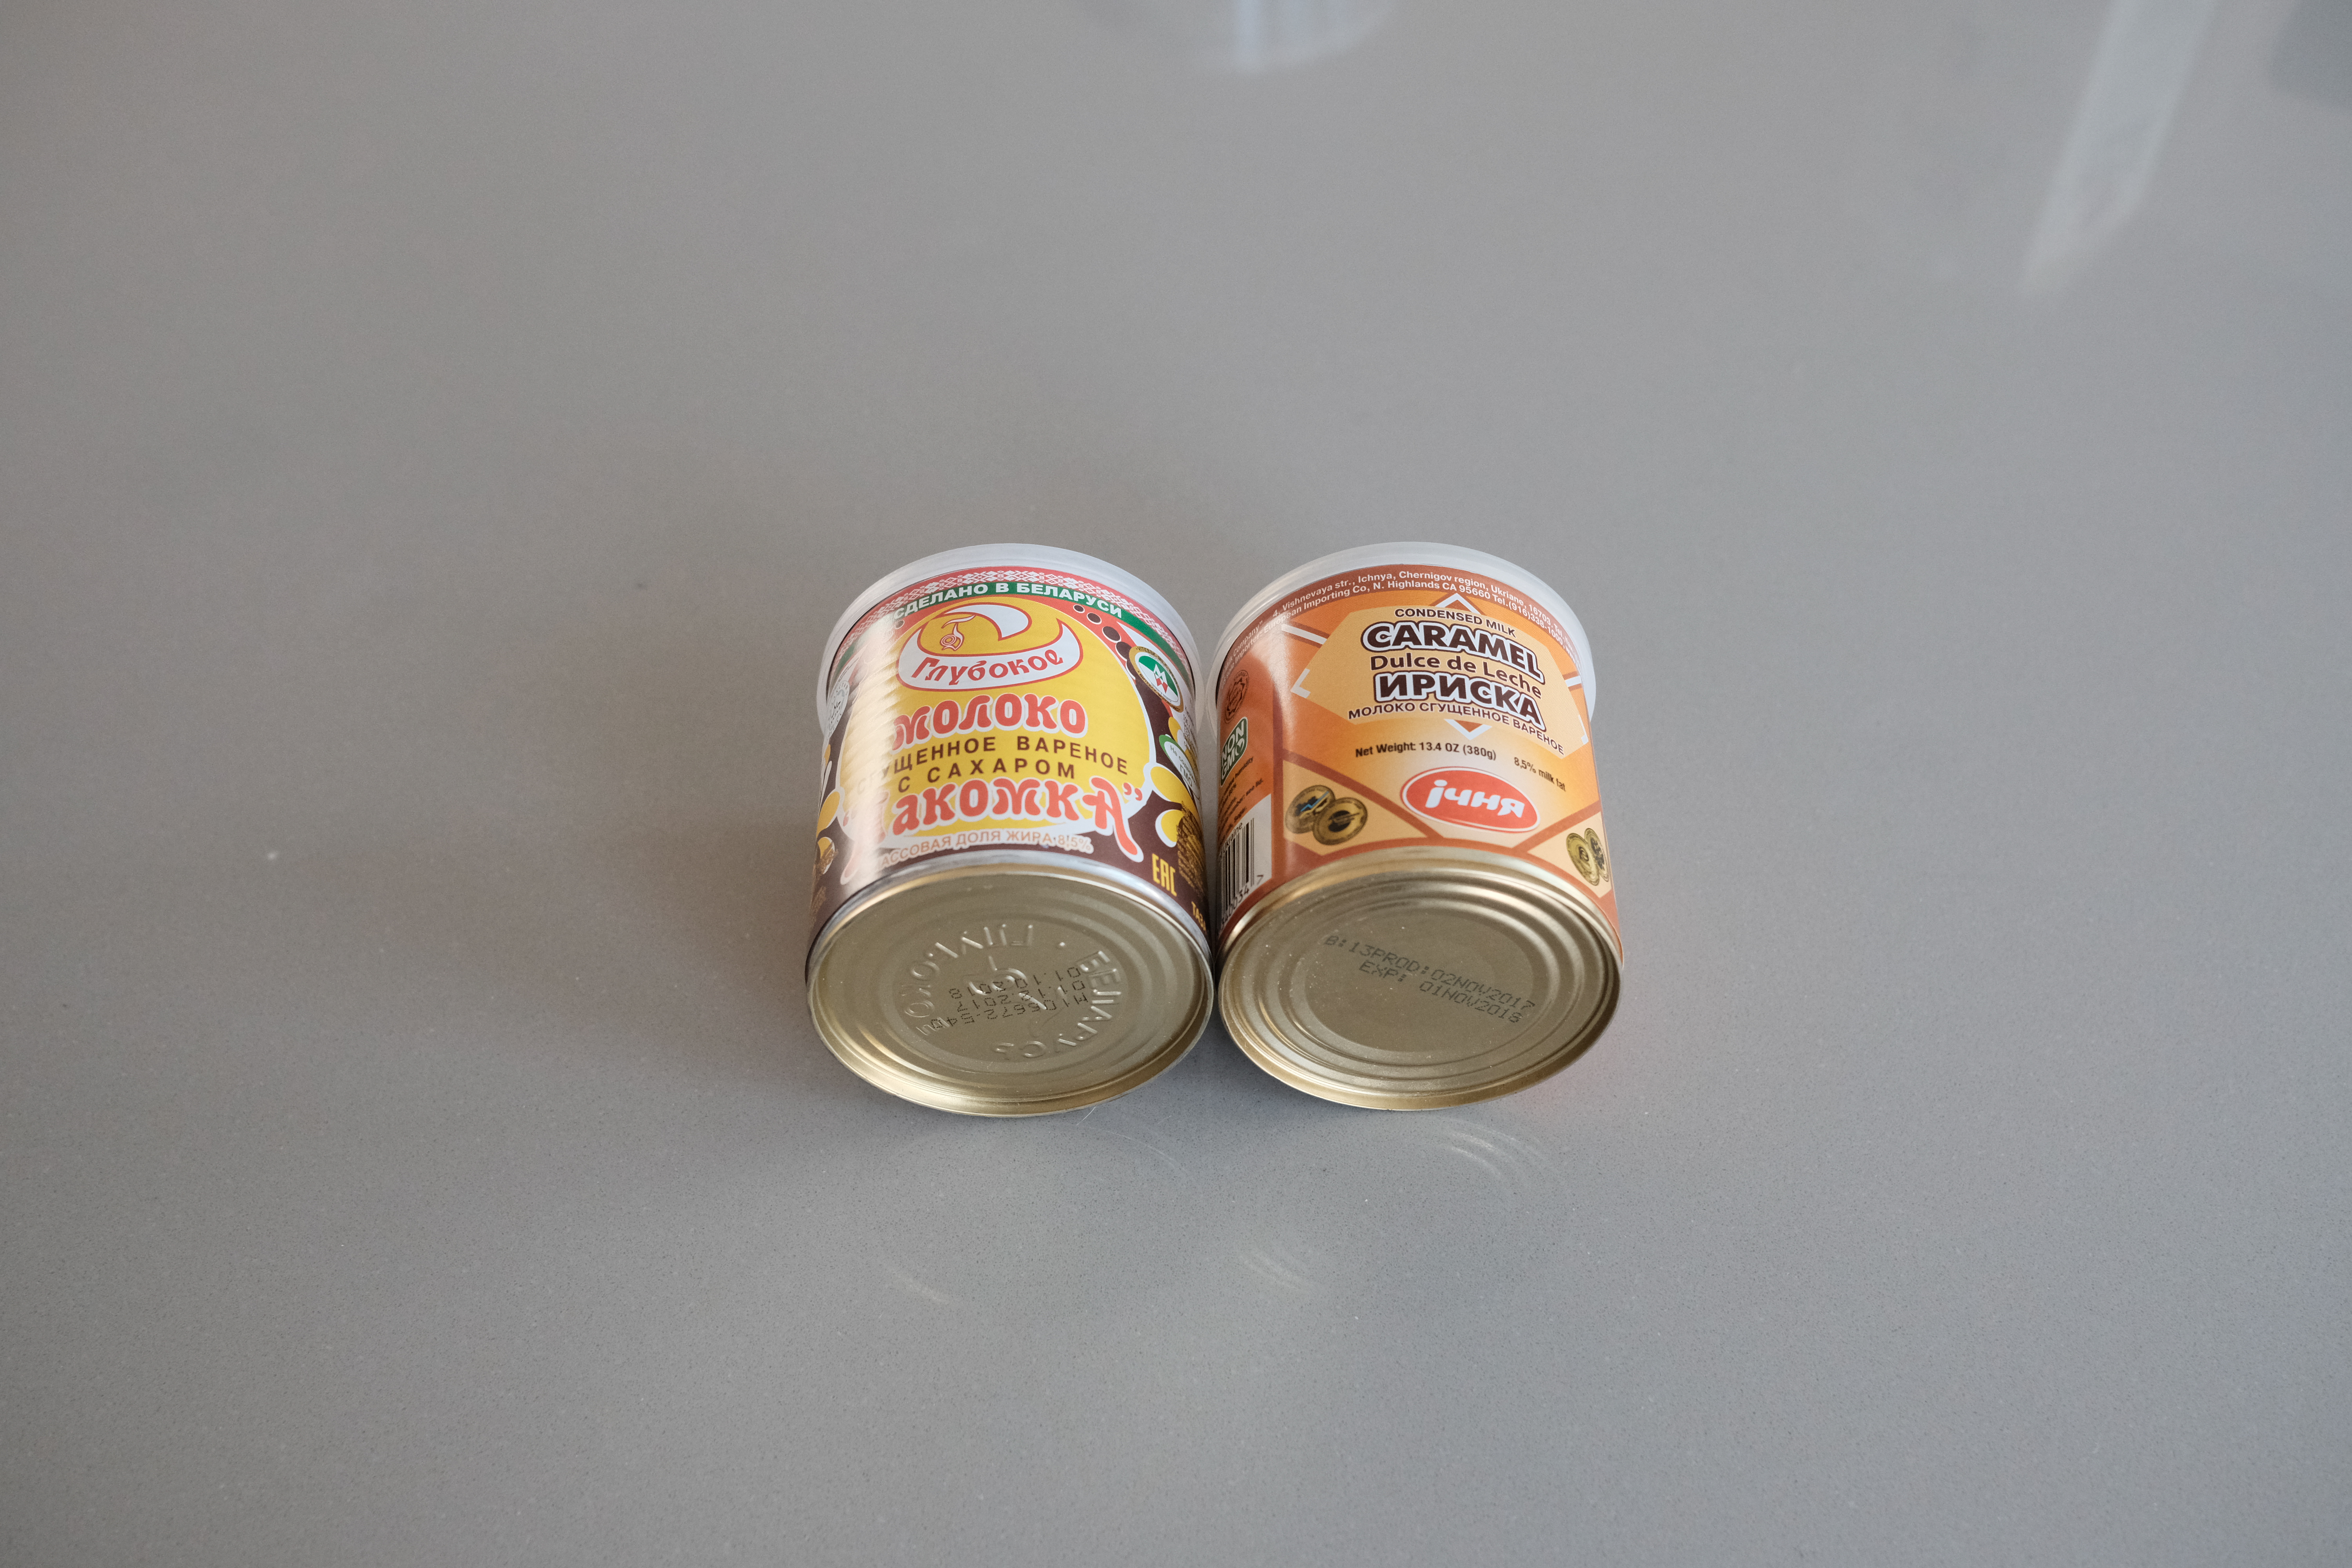
- 1 1/4 cups (1 13.3-ounce can) dulce de leche
- 4 3/4 cups heavy cream, chilled and divided into 4 cups and 3/4 cups portions
Notes about specific ingredients
- Honey – You want good wildflower honey.”Plain” honey will not work so well. The wildflower is distinctive but if you’re a honey/baking expert you can certainly substitute other varieties for a different taste. Also, you’re not reading that wrong, 18 ounces.
- Dulche de leche – You can cook this yourself from a can of condensed milk but that’s a lot of work. A European style market (or the Slavic Shop near me) will usually have a can ready to go. For bonus points, get one from a slavic country like Ukraine.
- Heavy Whipping Cream – You’re not reading that wrong. 4.75 cups.
Equipment
- Stand mixer (5qt capacity preferable)
- Double boiler (a pot of hot and a mixing bowl set over it)
- Lots of parchment paper
- Preferably at least two baking trays/pans/sheets that can each accommodate a 9″ round on it. A half sheet works well.
- A decent amount of counter space – Cooling lots of cake layers will rapidly eat whatever counter space you have. Plan ahead to take over a dining table, an office, the couch, whatever you need.
- Cake decorating turn table, offset spatula
- Small food processor (not absolutely necessary but makes quick work of making crumbs for the final finish).
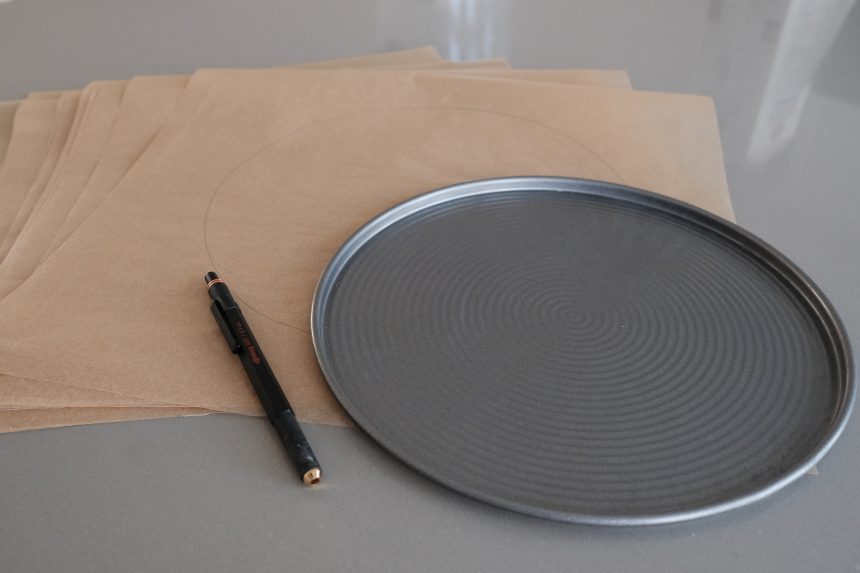
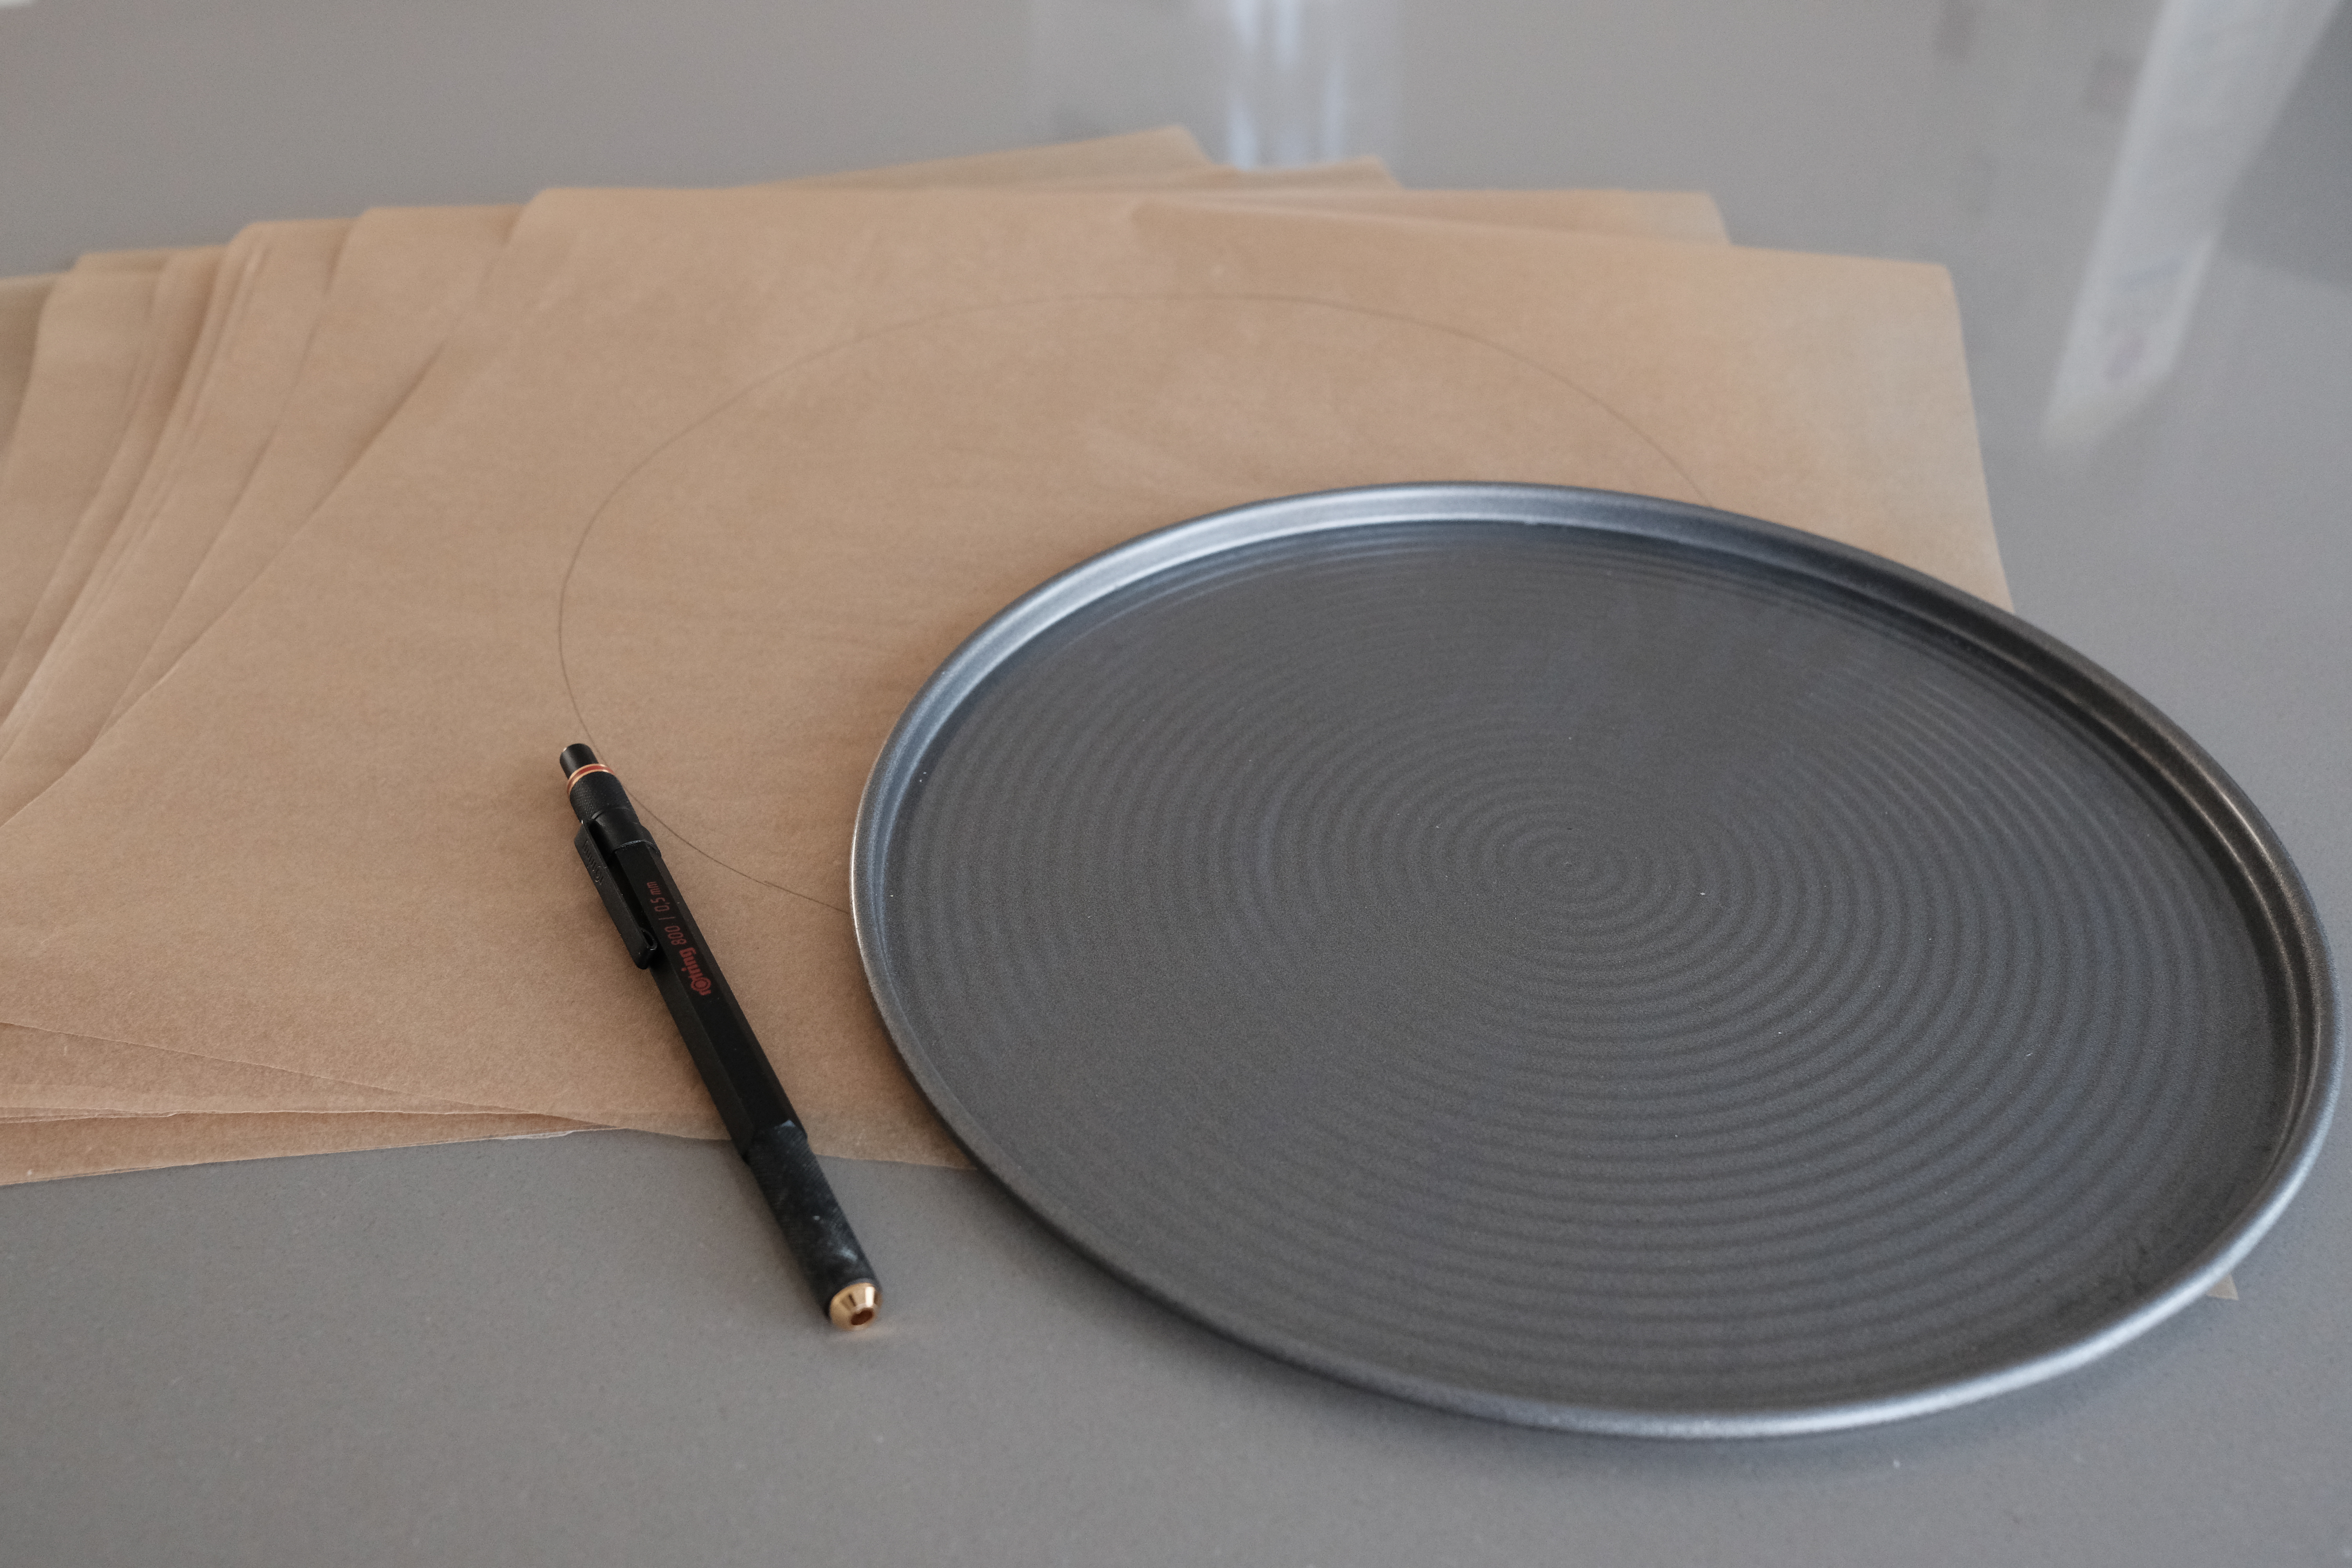
- A pencil and a 9″ circle to trace around (the bottom of a 9″ springform works very well).
- Fine-mesh sieve or flour sifter.
Preparation
- Preheat oven to 375F.
- Cut 12 sheets of parchment paper and trace a 9″ circle onto each.
- Make a hot water bath: fill a small sauce pan with water and set over medium heat.
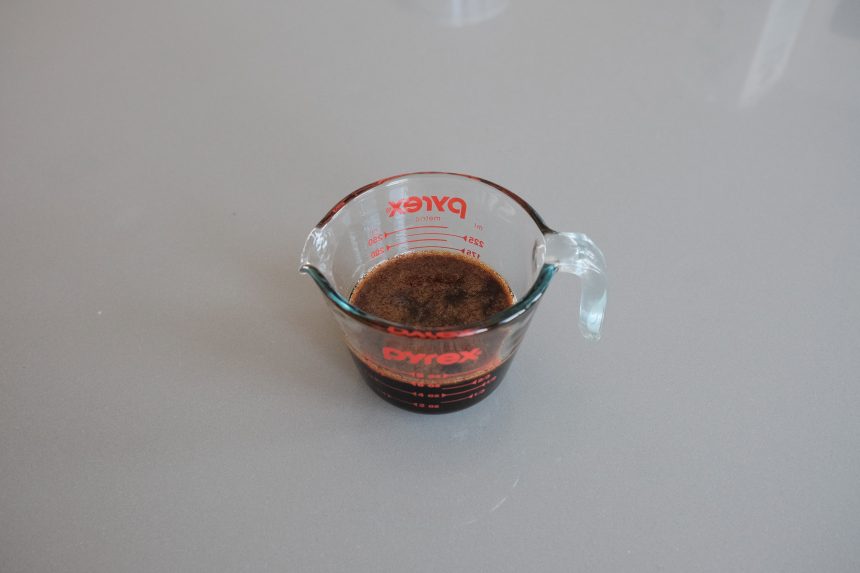
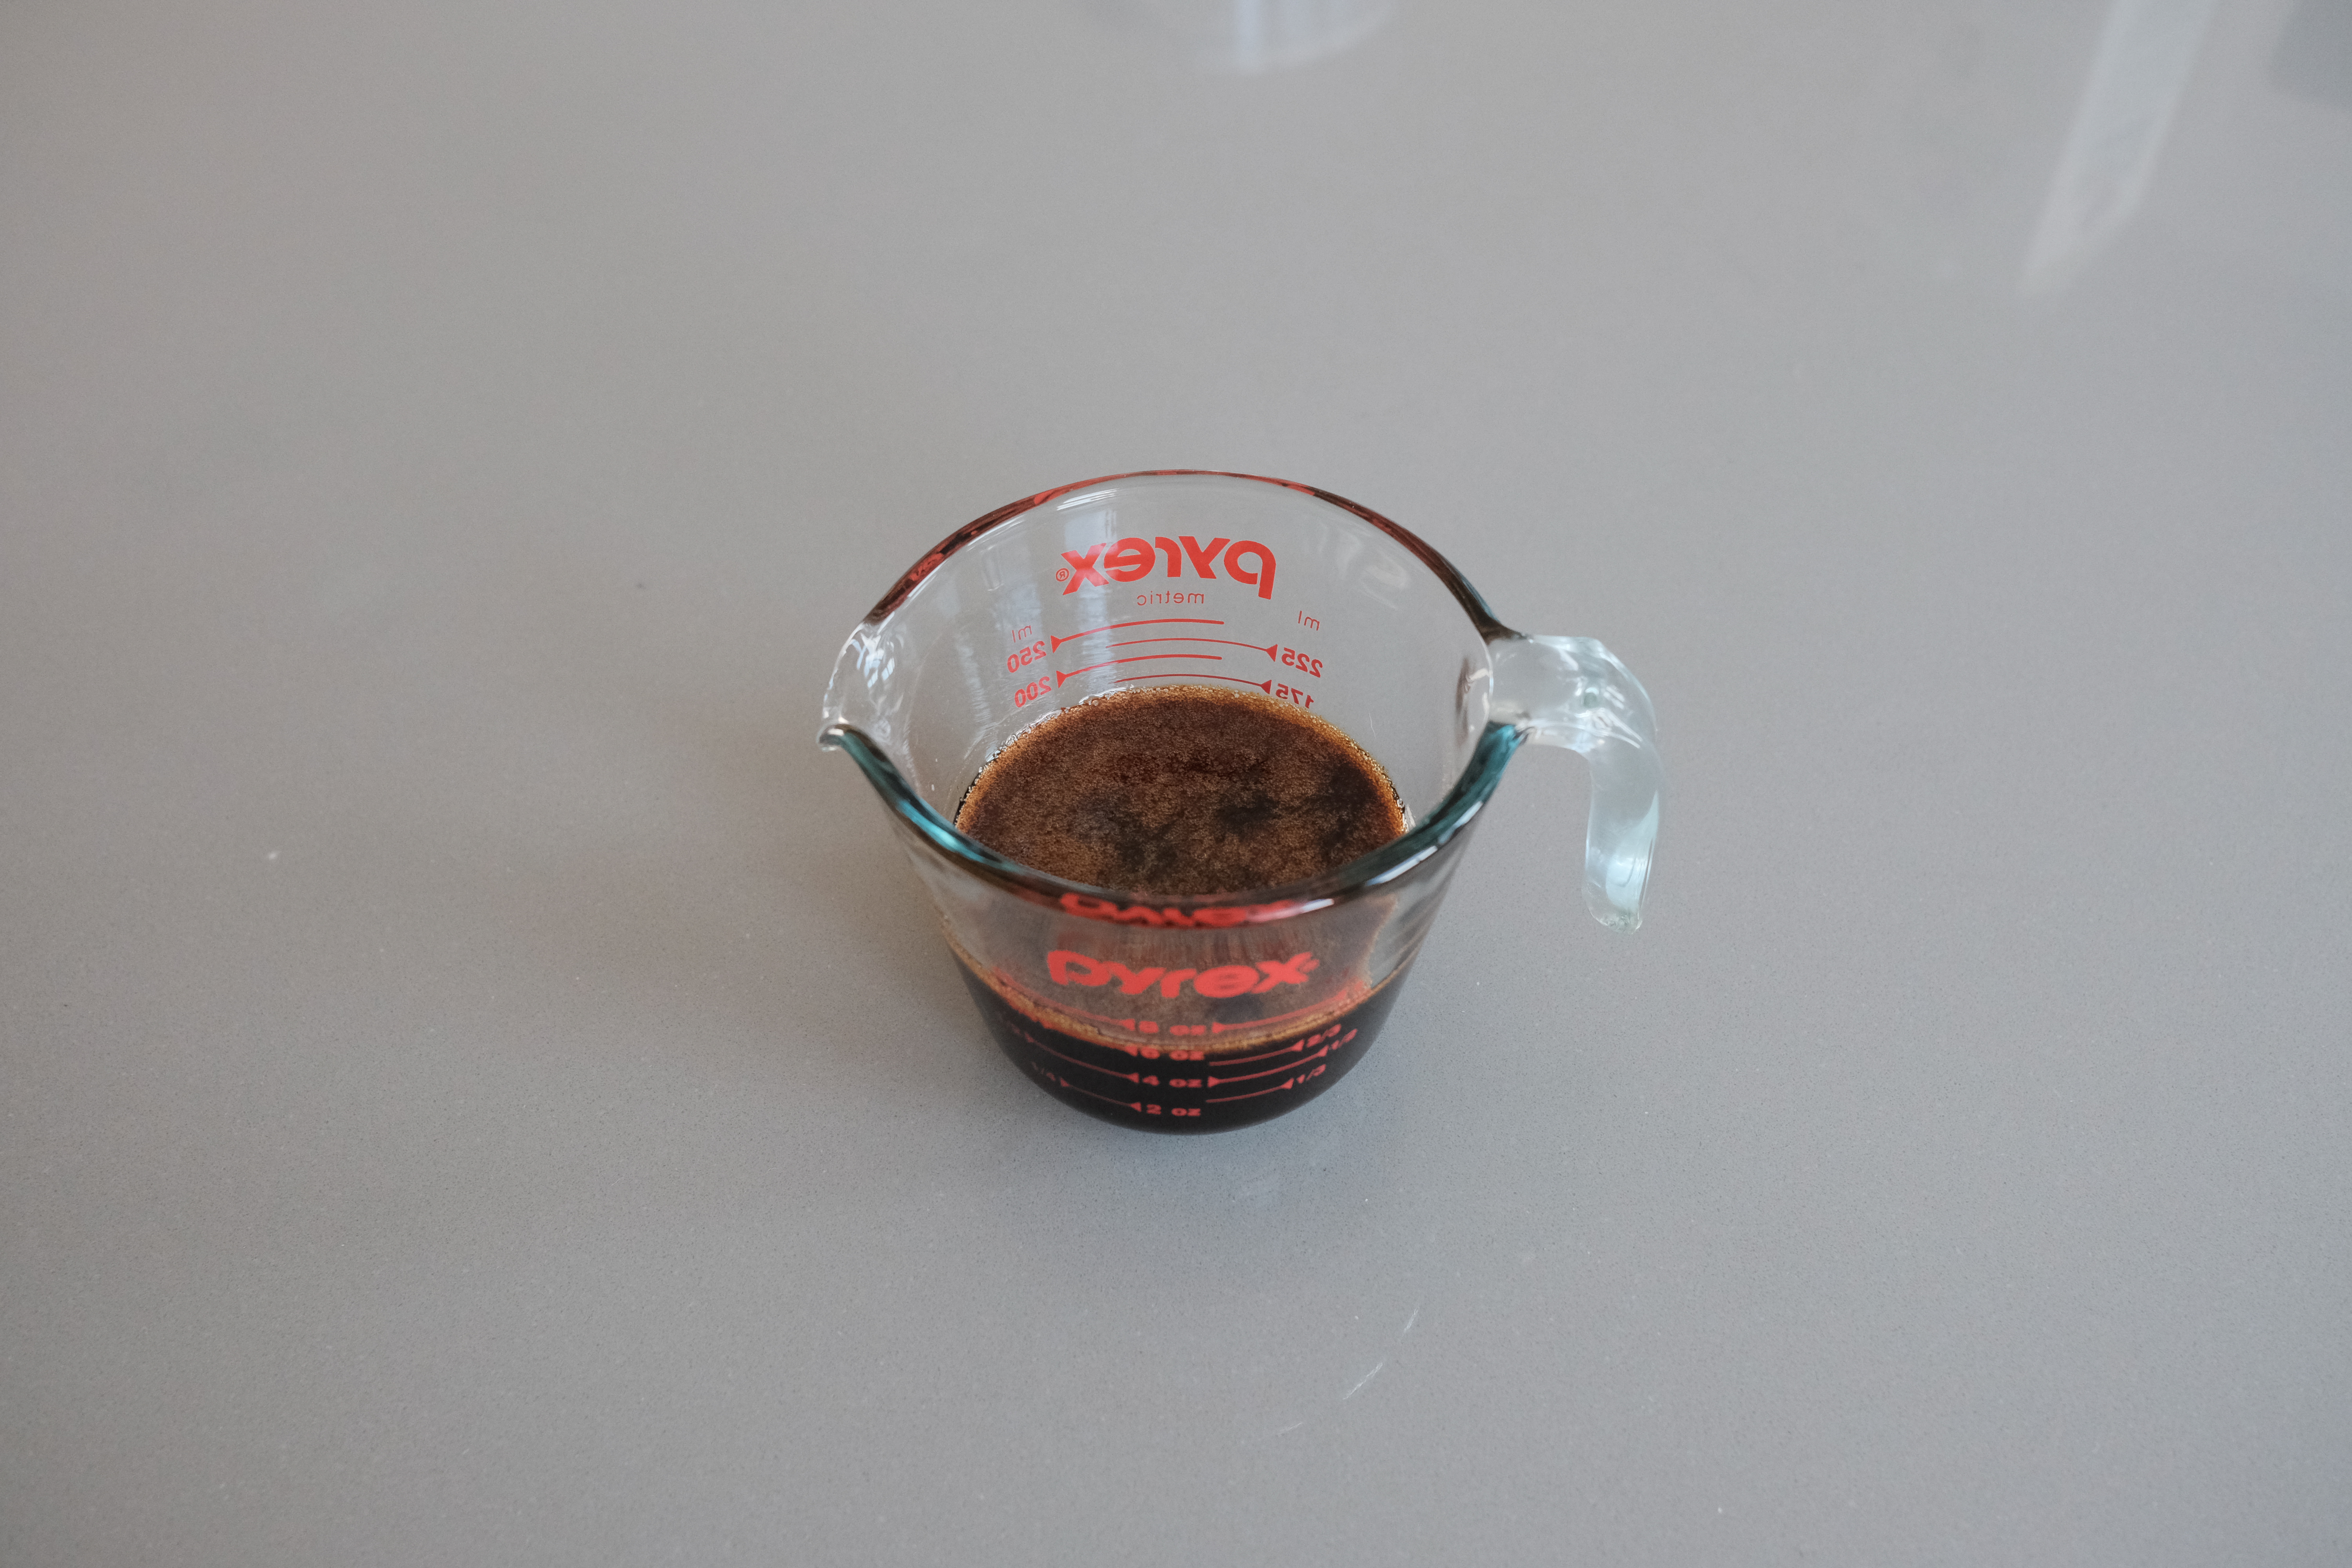
- At this point you also want to make sure you have a measure cup resistant to heat (glass is ideal) that you can set into your small sauce pan as the burnt honey will go into this measuring cup and be kept warm/liquid until ready to use.
- Make the burnt honey
- Place 3/4 (9 ounces) of honey in a small saucepan over hight heat. Bring to a simmer and then reduce heat to medium.
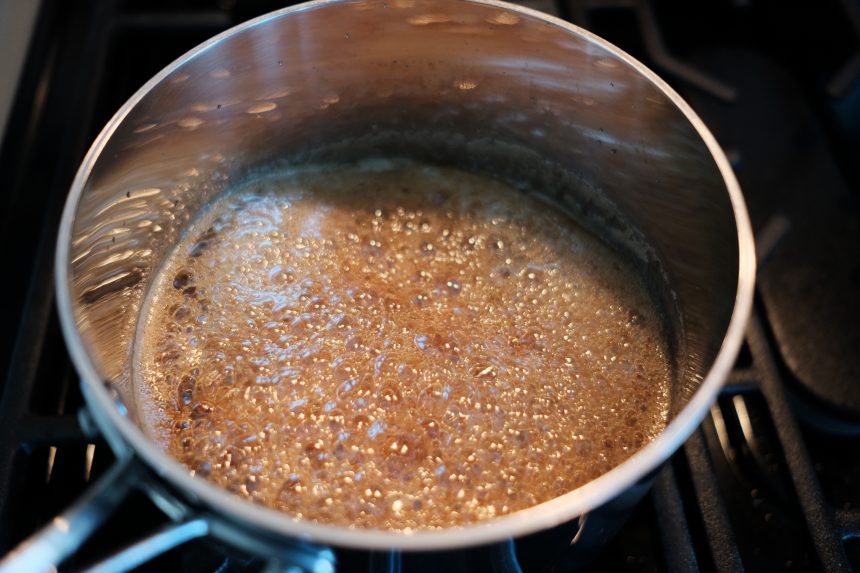
- After a little while (~3 minutes), the honey will begin to foam.
- Stir occasionally with a wooden spoon until the honey begins to smoke.
- The honey will smoke because most of the water content has evaporated. It’s not always easy to see the smoke so shift your perspective until you have a dark background behind the pan so that the smoke can contrast more easily.
- The honey color will darken considerably but it can be a little hard to tell with the foam. Feel free to lift the pan and swirl the honey with the spoon to get a slightly better view of it temporarily.
- Once smoking, turn off the heat immediately and carefully add the water.
- The honey will sputter and spit as you’re adding water to a VERY hot pan!
- Really, you may want to dump in the water quickly as a lot of steam will be released very quickly. It’s exciting and also just ever so slightly dangerous.
- When the honey has stopped sputtering, whisk to combine and pour into a heatproof measuring cup with a spout and put it in the water bath.
- Place 3/4 (9 ounces) of honey in a small saucepan over hight heat. Bring to a simmer and then reduce heat to medium.
- Make the batter
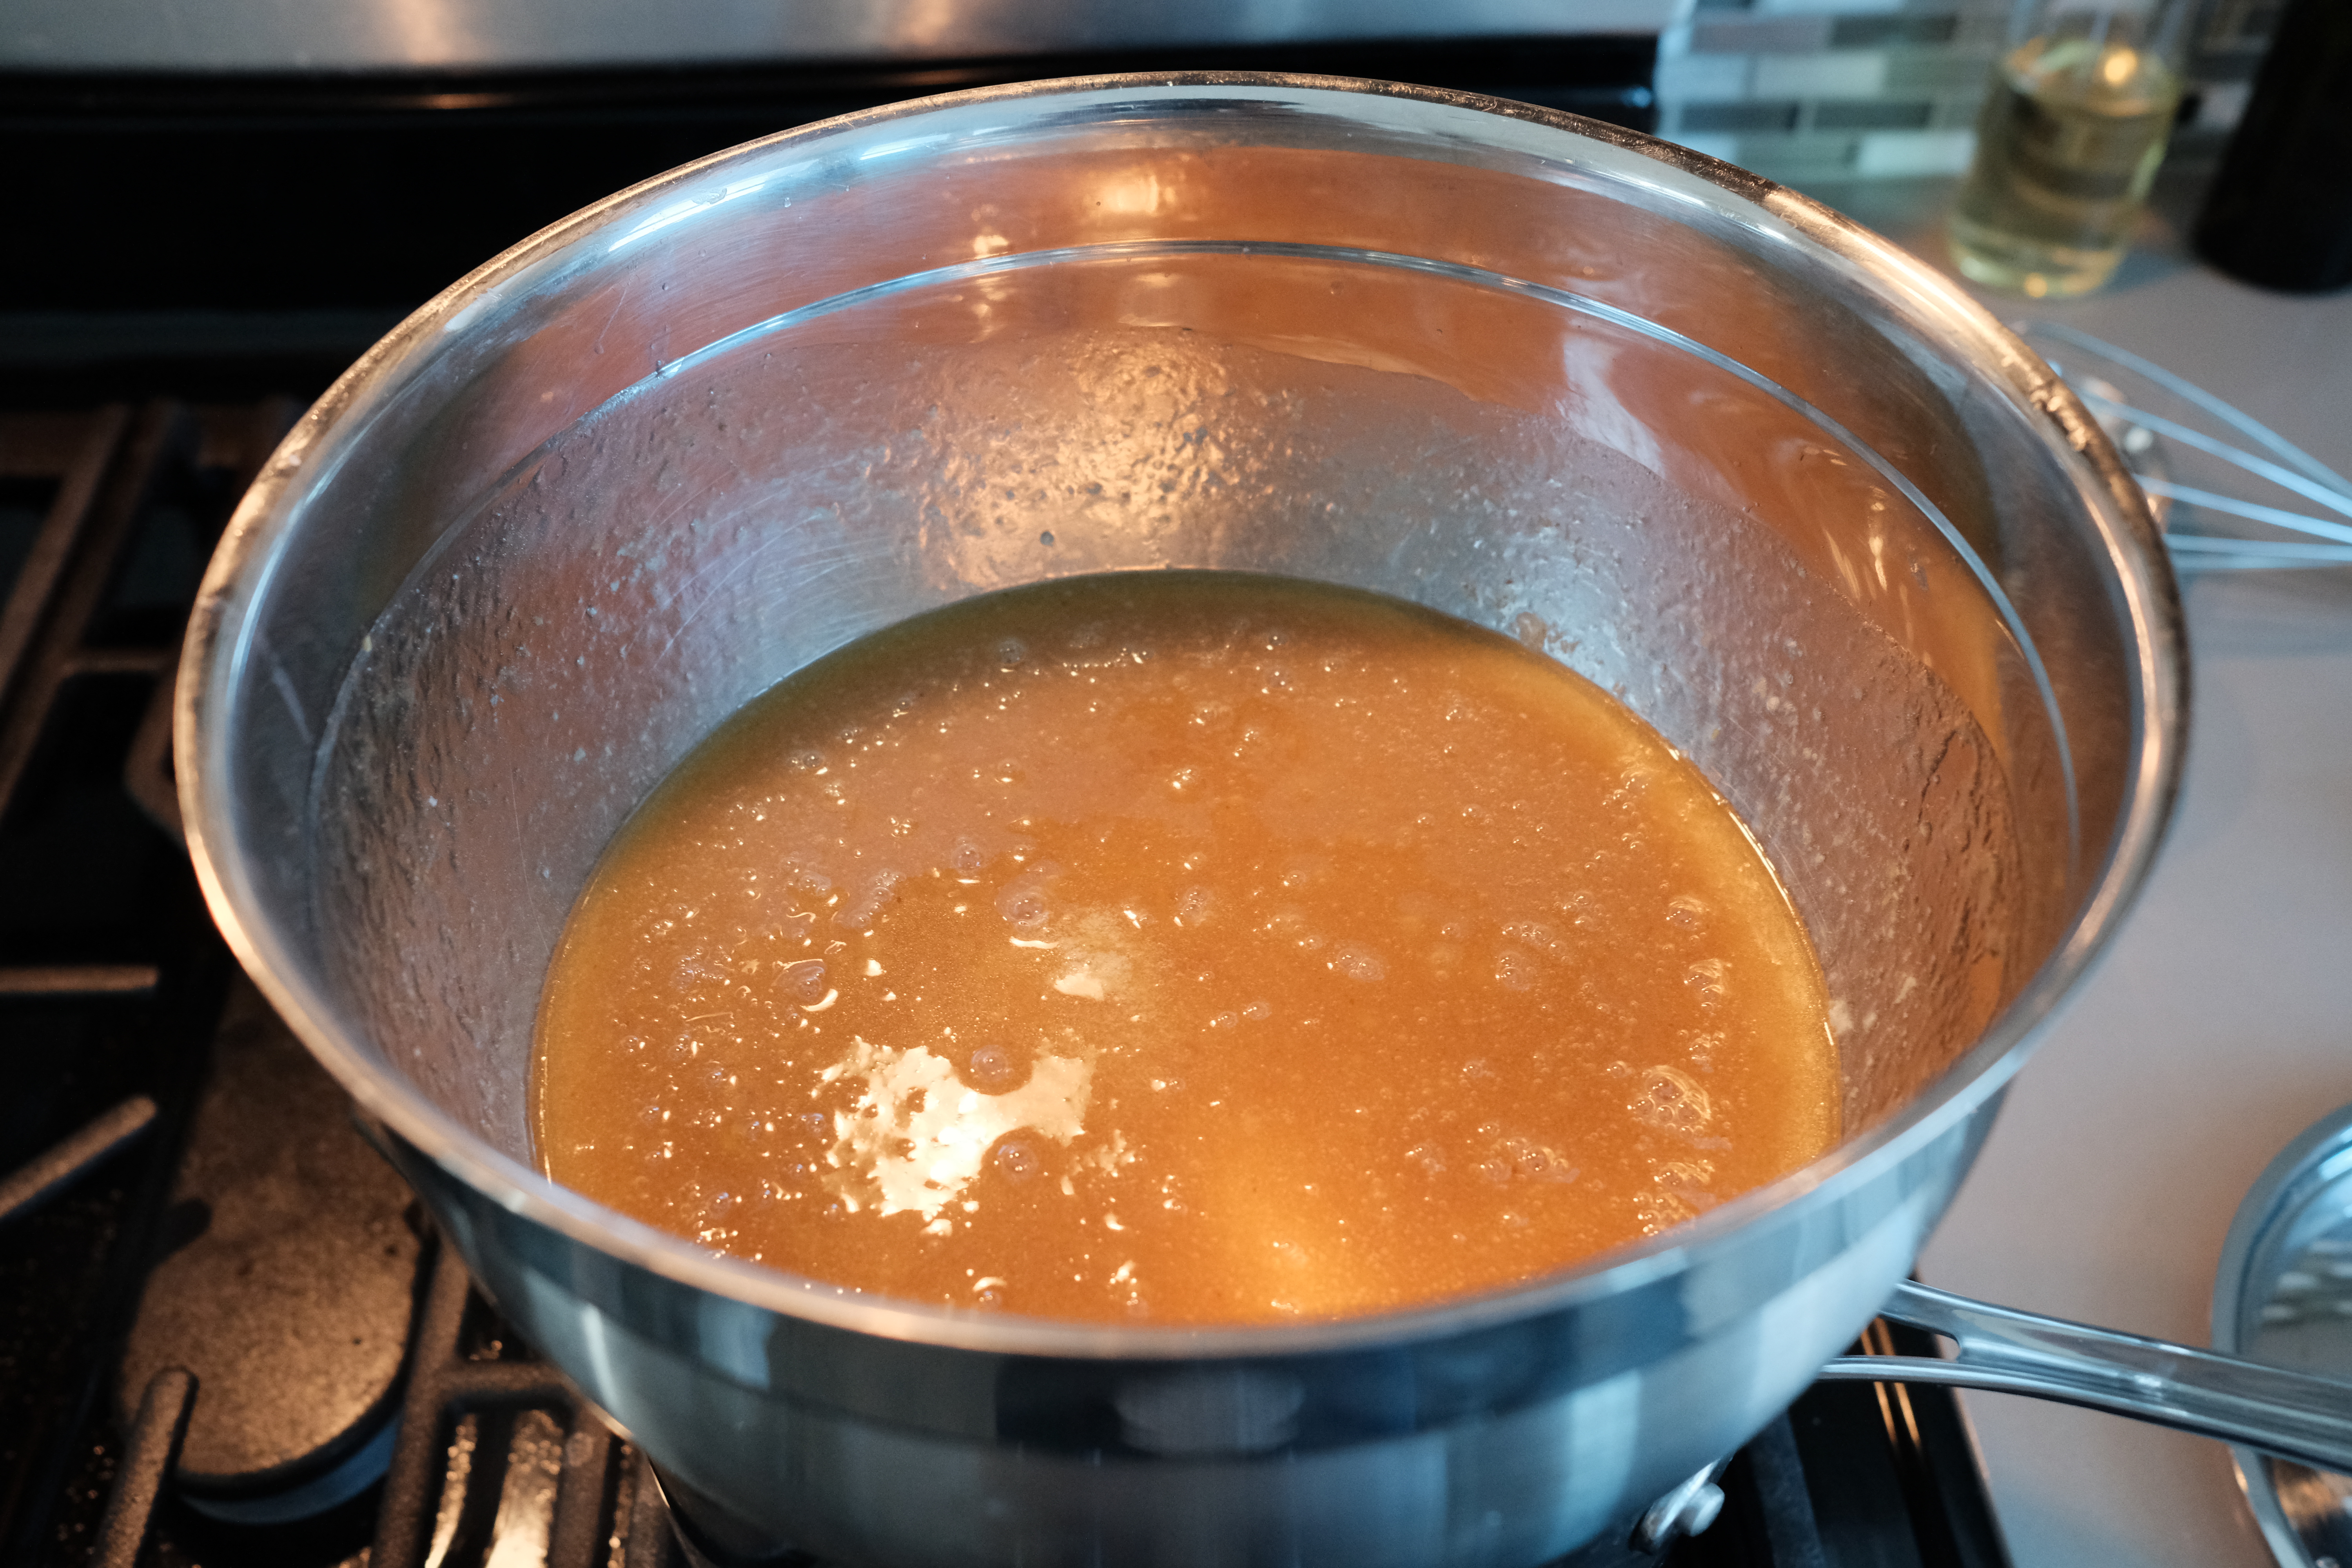
- Fill a medium sauce pan with 2 inches of water and bring to a simmer for the first part of the double broiler.
- In the second part (a mixing bowl that will fit over the sauce pan), combine 1/4 cup of the burned honey (about 3 ounces), 3/4 cup of normal honey (9 ounces), all the sugar, and butter and place over the water.
- Meanwhile
- Crack the eggs into a small bowl and set aside.
- In another small bowl, stir together the baking soda, 1 1/2 teaspoons of kosher salt (careful, this is not all the salt), and all the cinnamon.
- Wait for the butter to melt and once the butter has melted, whist the honey mixture to combine. When it’s warm (around 150F), add the eggs while whisking. Once combined, return the mixture to around 160F.

- Add the cinnamon mixture and then whisk for another 30s. Remove the bowl from heat.
- Place flour in a fine-mesh sieve or flour sifter and sift over the egg batter in 3 batches.
 Whisk to incorporate the flour completely with each batch (an optional electric hand blender can be useful here). The batter should be smooth.
- The hotter the batter the more easily spreadable it is. Doing all 12 layers sequentially as fast as I can, 160F lets me finish while it is still spreadable.
- If you want to be a little safer, transfer half the batter into a different bowl and keep in a warm place, such as atop a preheating oven. If the mixture gets too cold and thick you can always warm it back up slowly over the double boiler.
- Spread the batter
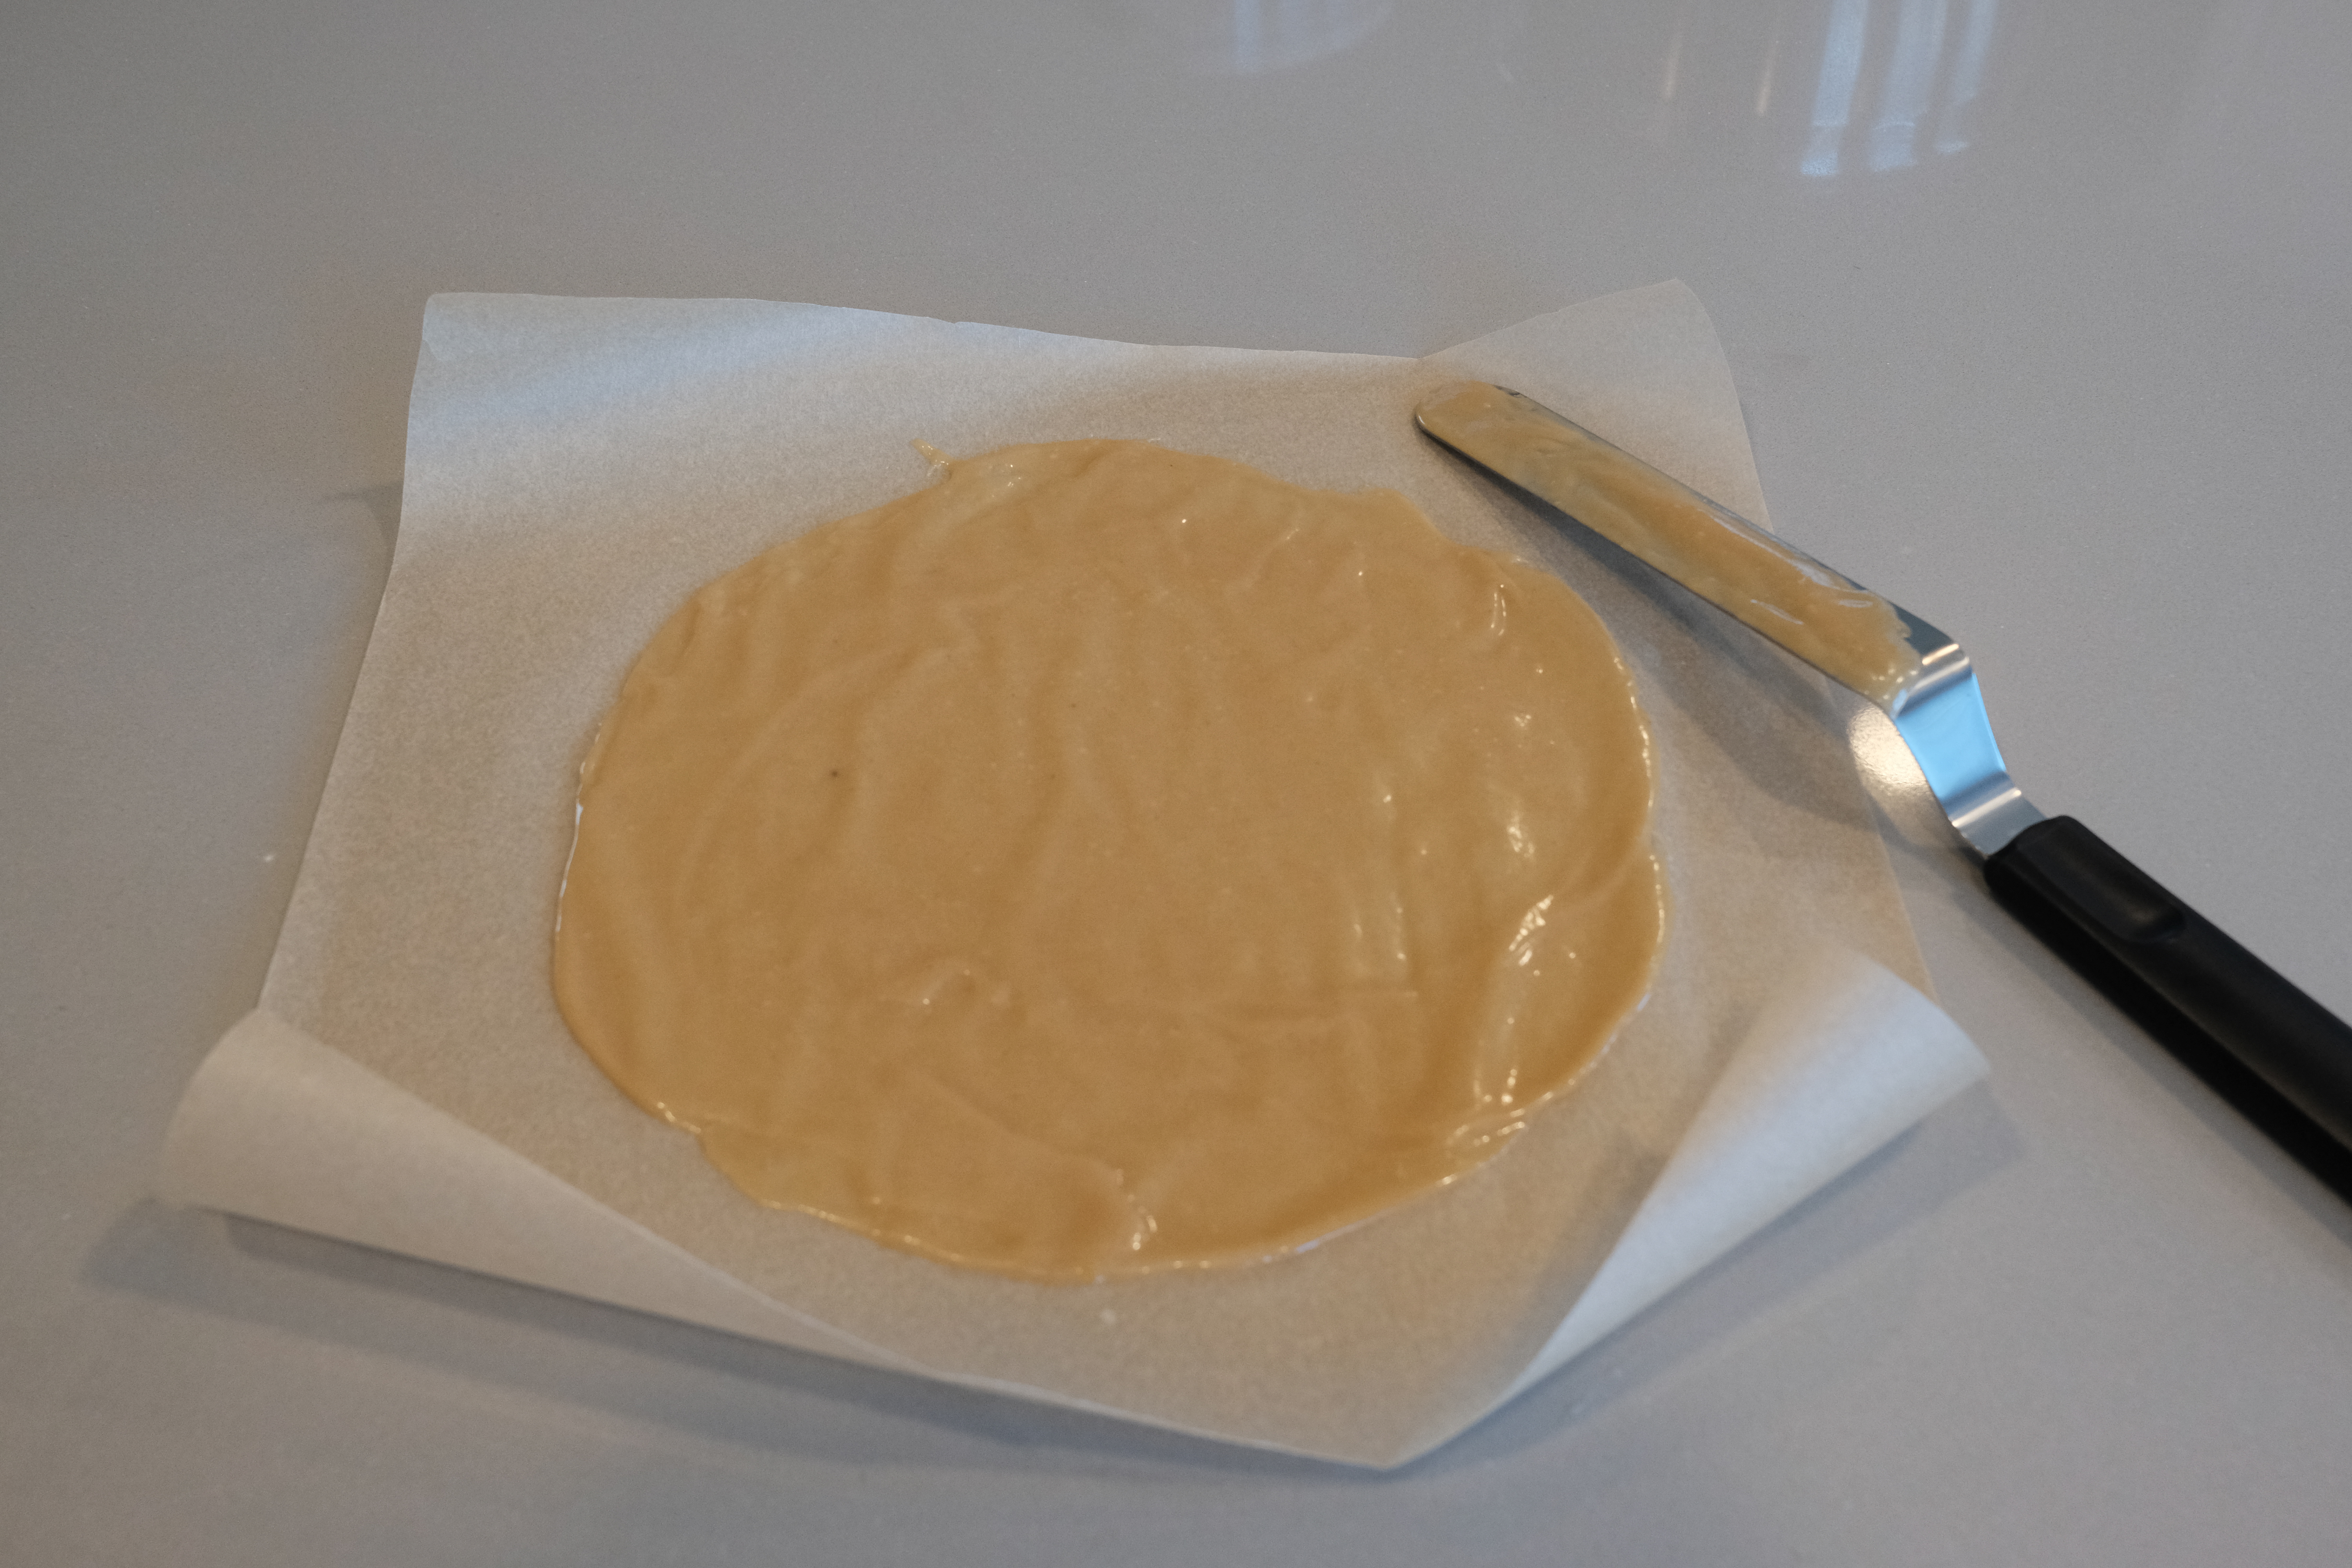
- Take a piece of parchment paper and place it tracing-side down.
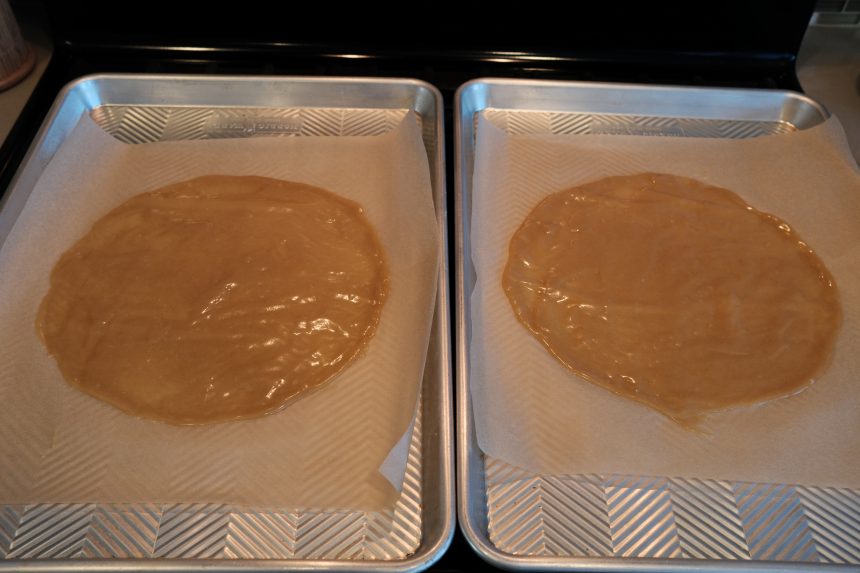
- Spoon a heaping 1/3 cup of batter onto the paper and spread into a 9″ circle with an offset spatula. The batter will be very thin.

- Instead of trying to spread a perfect 9″ circle, spread until the batter is just outside of the circle. This generates less anxiety now and we can trim back into a 9″ circle once it’s finished baking.
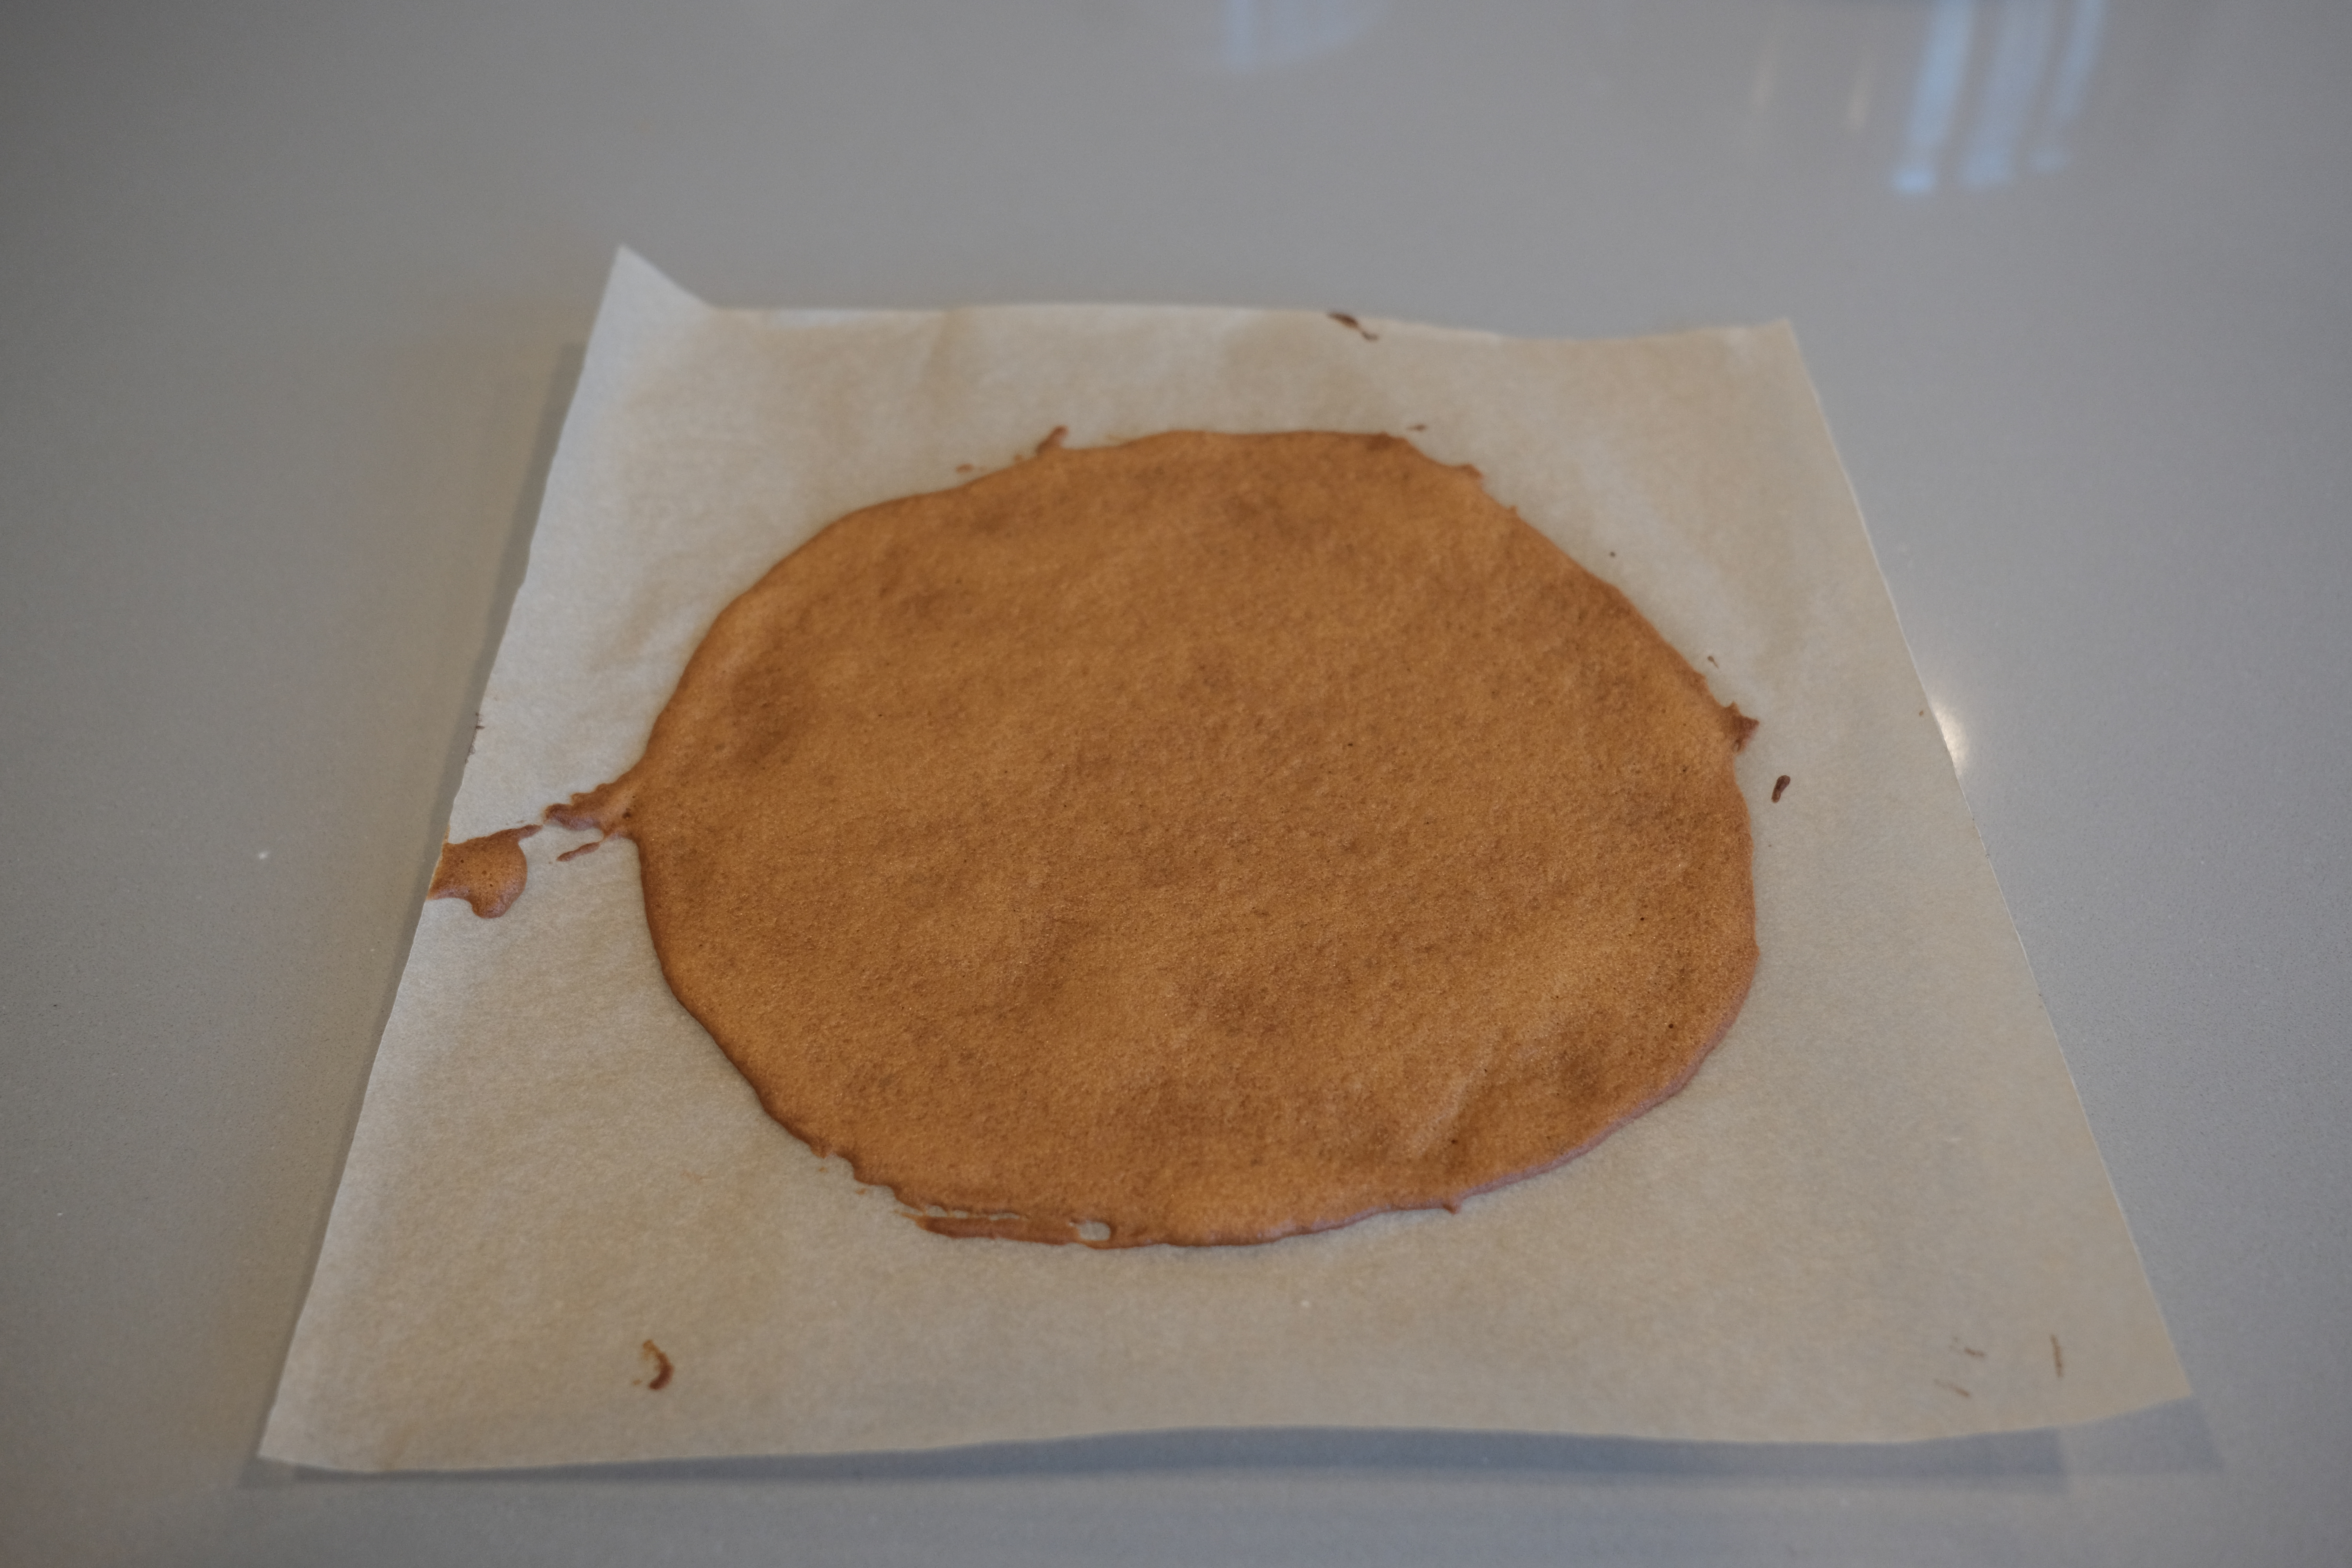
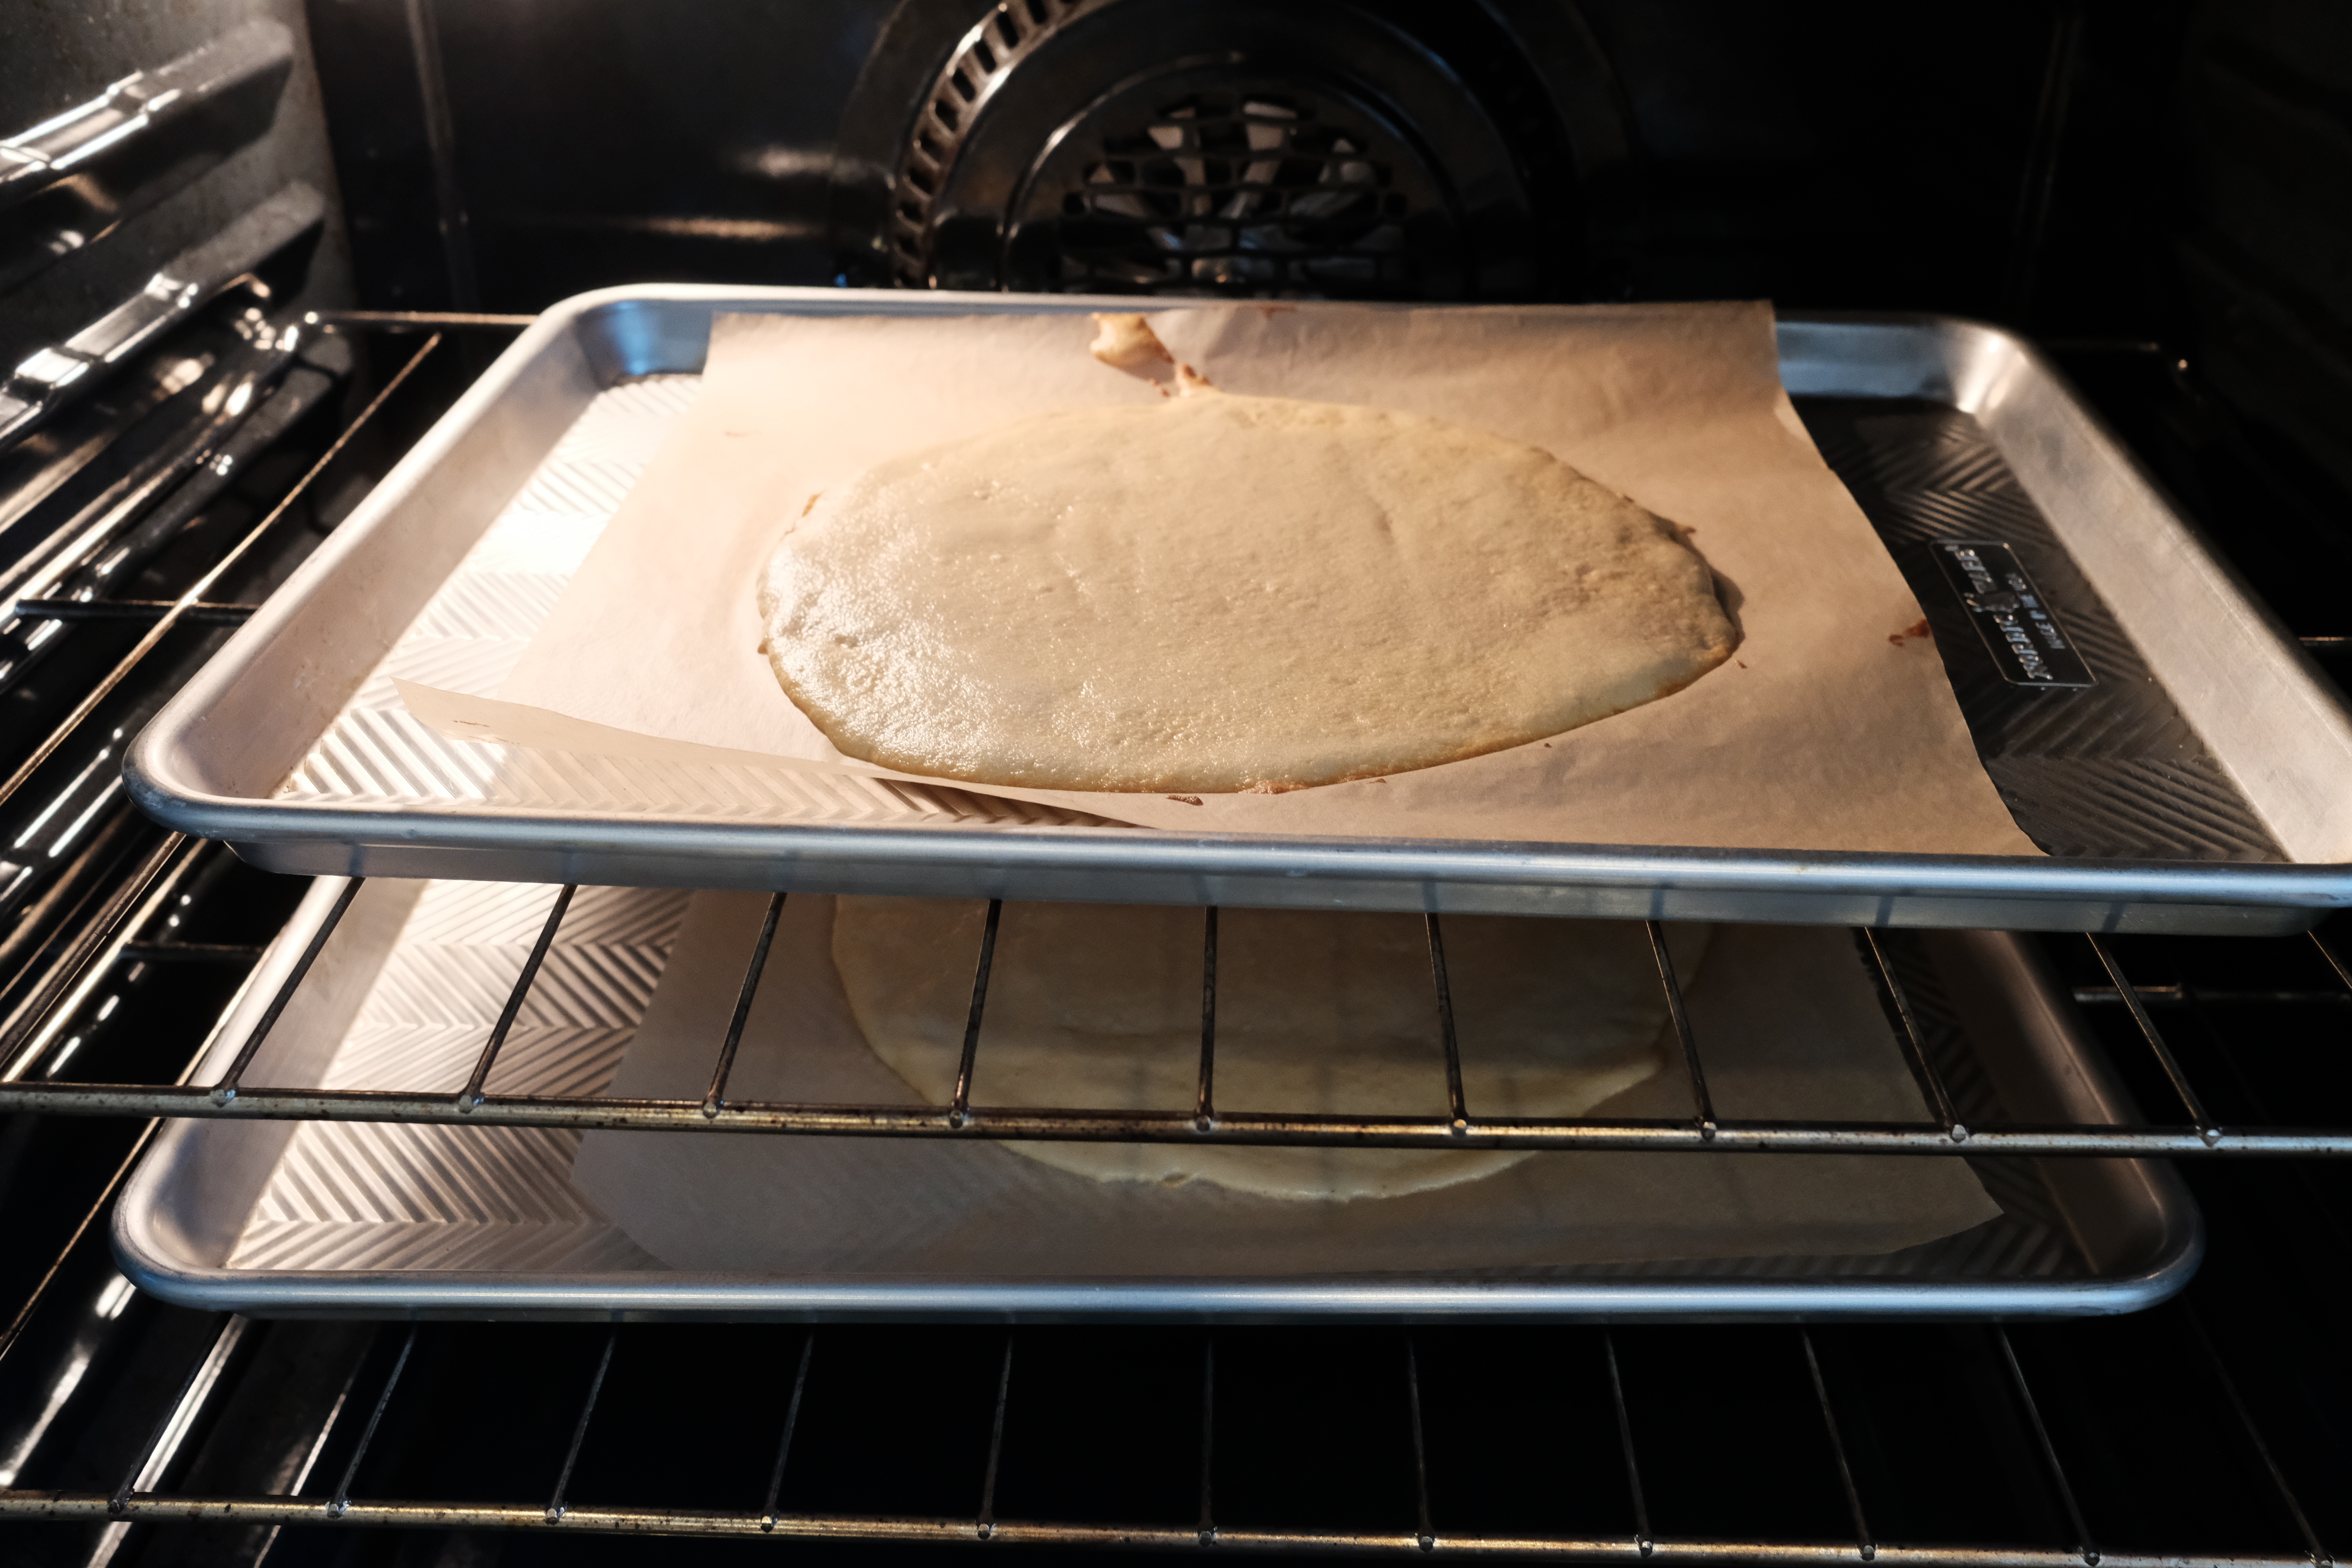
- Bake the layers.
- Put each piece of batter onto a baking pan and bake for about 7 minutes, until the cake turns a deep caramel color and the center springs back to the touch. Do not overbake!

- If you have two 1/2 sheets like I do, put them in the oven two at a time on two different racks and switch their positions (top to bottom) about halfway through. You’ll be able to judge how much time you need approximately after the first batch.

- Don’t worry if the layer has some parts that are a little thicker than others. You can always work on your spreading technique next time but it will not affect the cake too much unless you have areas where the cake is turning into a crispy cookie.
- You may need to adjust the time down when you’re re-using the pans as they’re now warmer than when you started. Just take a quick look or poke 30 seconds before you think they will be done to make sure.
- “Spring back to the touch” is an accurate test! If the cake remains indented with no spring at all after you poke it it is not quite done.
- If you have two 1/2 sheets like I do, put them in the oven two at a time on two different racks and switch their positions (top to bottom) about halfway through. You’ll be able to judge how much time you need approximately after the first batch.
- Put each piece of batter onto a baking pan and bake for about 7 minutes, until the cake turns a deep caramel color and the center springs back to the touch. Do not overbake!
- Repeat steps 6 and 7 with all batter, cooling and trimming in between bakes.
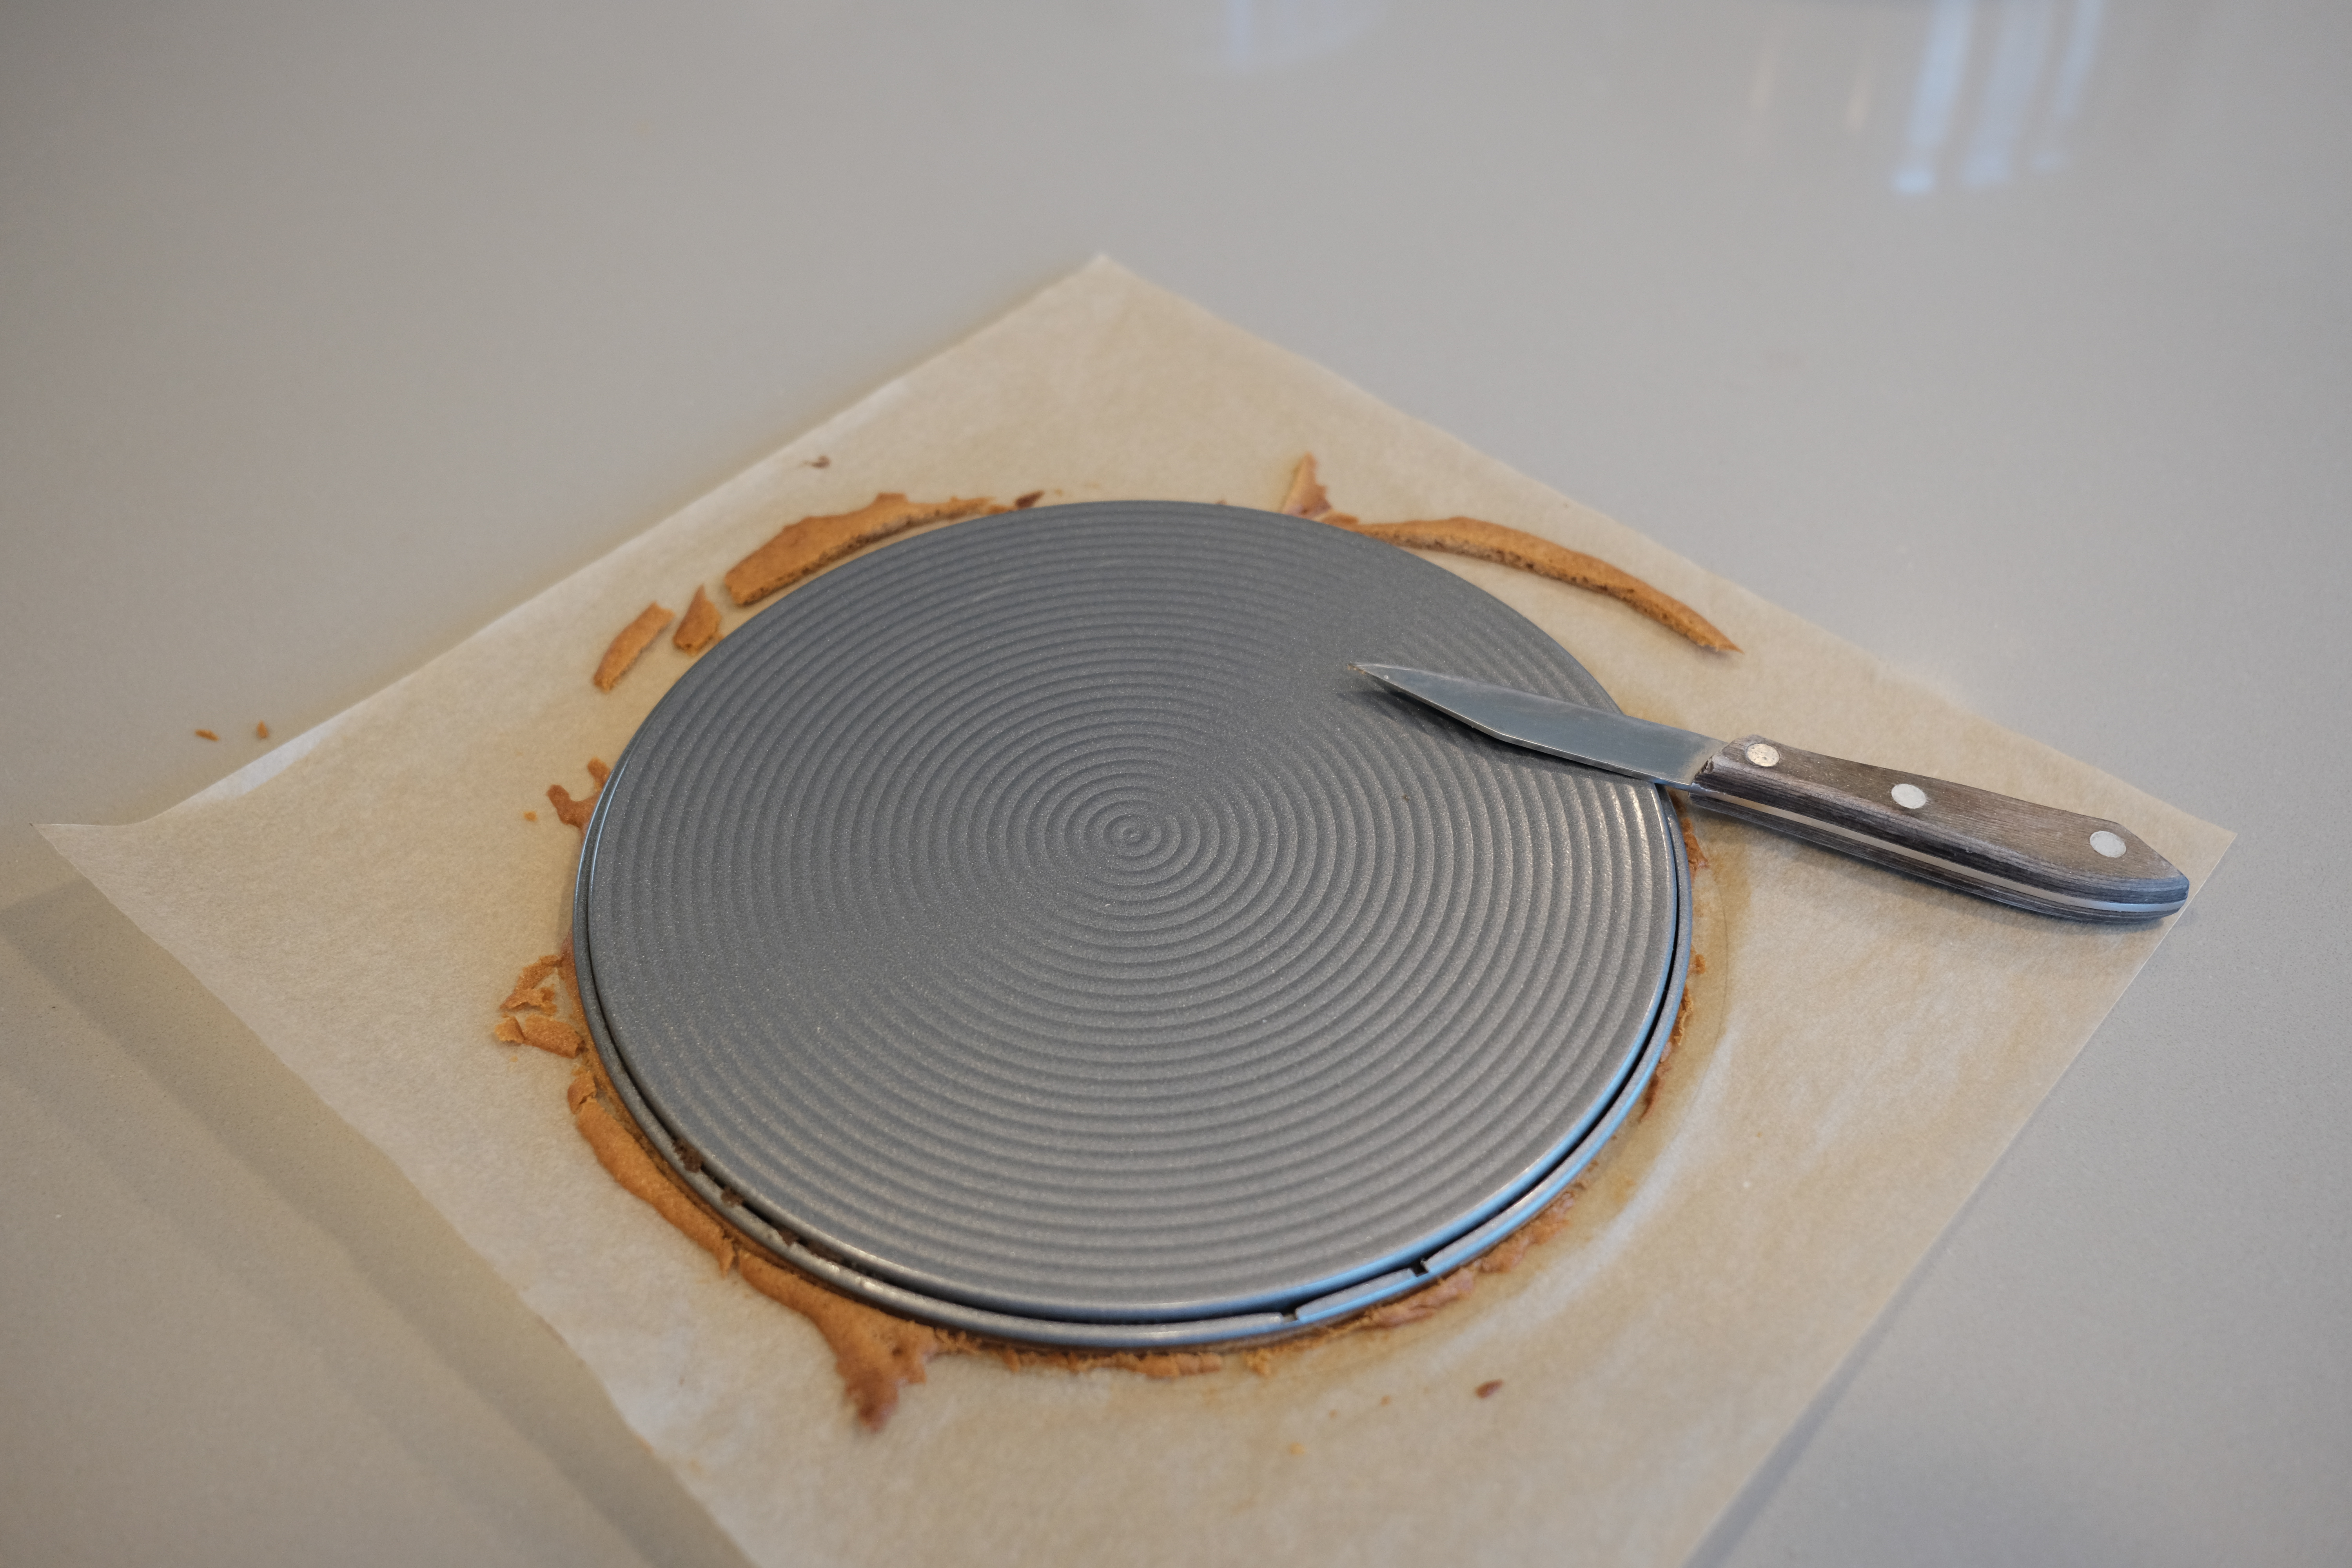
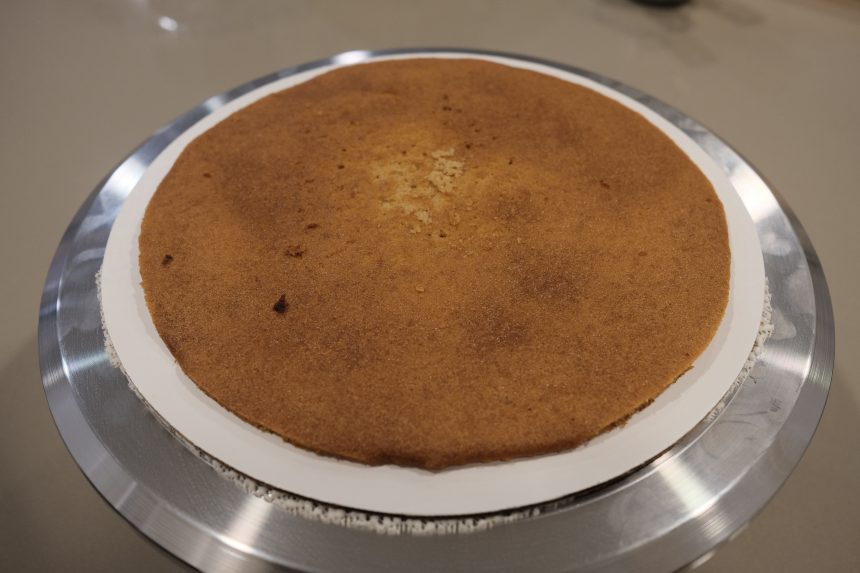
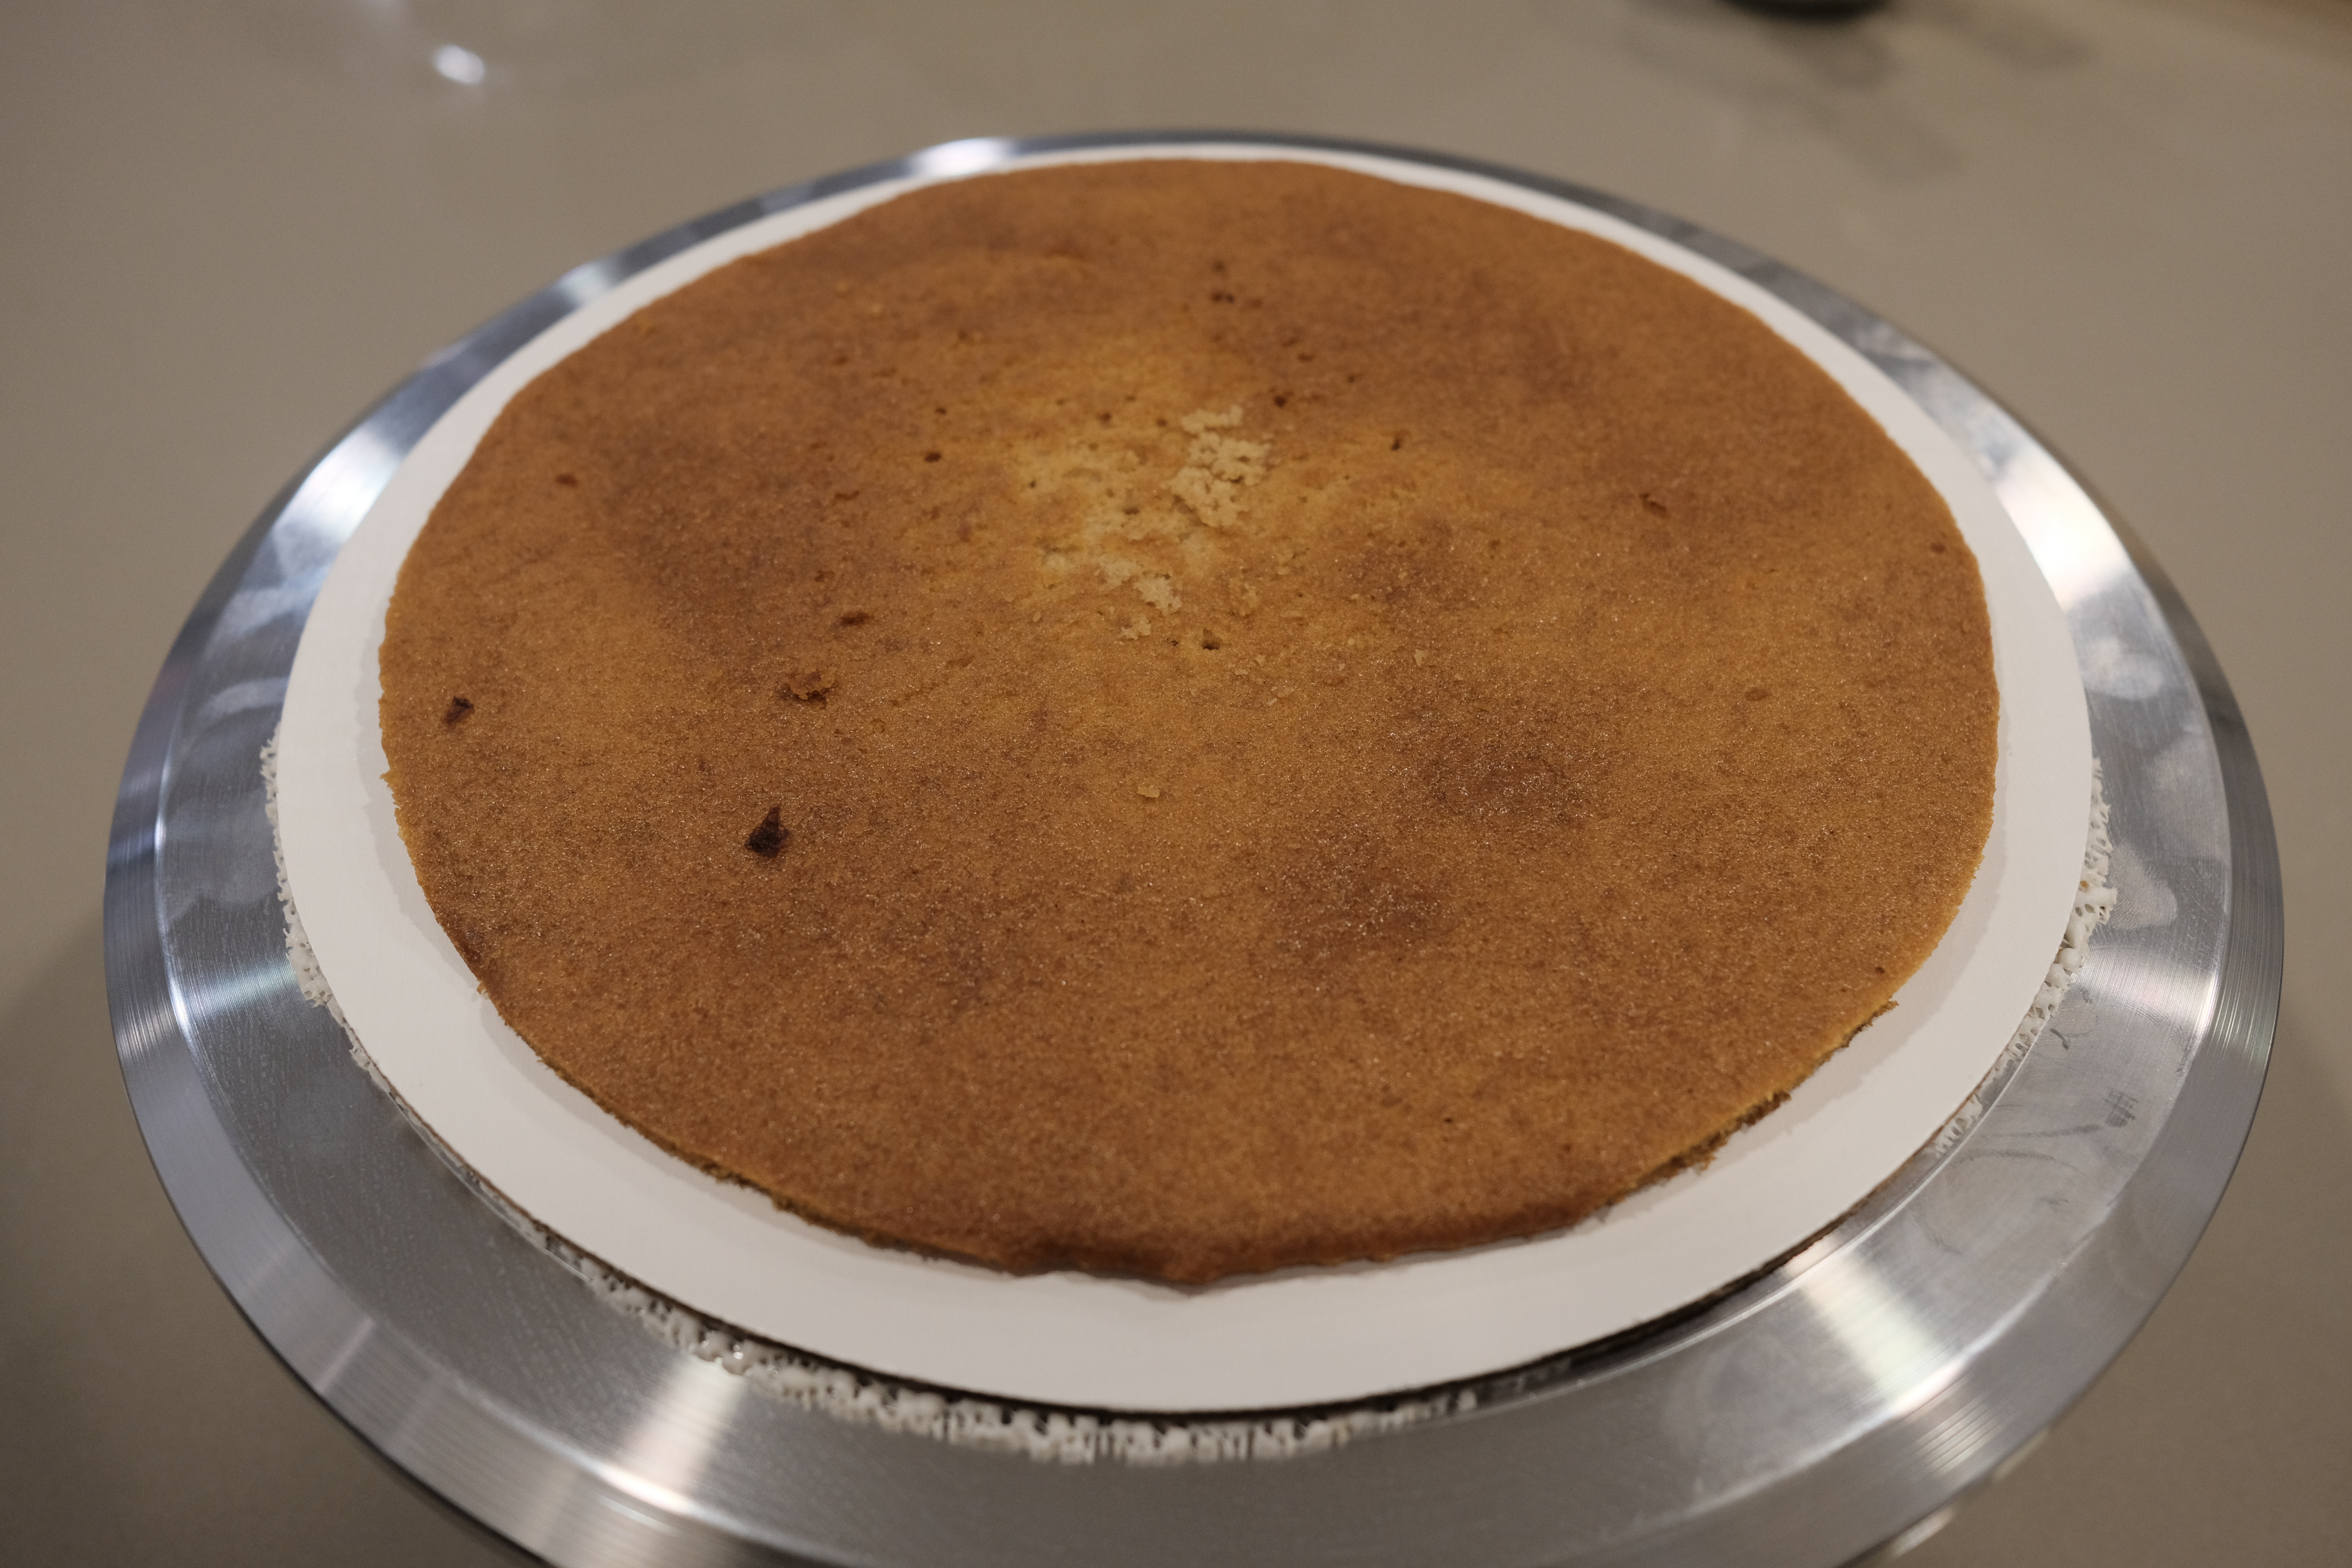
- After each layer is done baking, remove them from the pan and cool for a minute or two until the cake is easy to handle.
- With the 9″ springform bottom (or whatever you used to trace the 9″ circles) as a guide, use a small sharp knife to cut off any excess so you’re left with a 9″ circle.
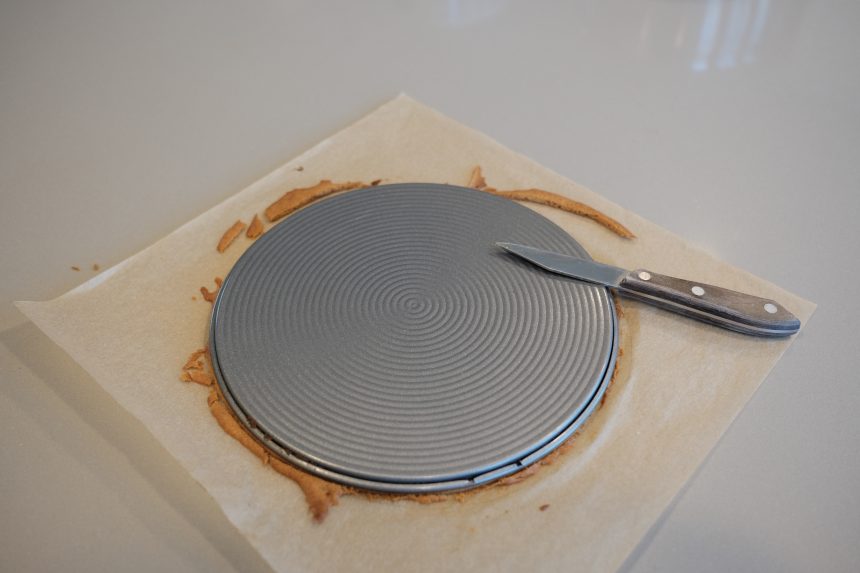
- Here’s where spreading batter outside the 9″ is useful. The edges tend to crisp up so it’s easier to get a perfect round if you’re drawing 9 1/4″ circles and then trimming the extra. The trimmings make an EXCELLENT snack.
- Pull off the parchment paper and then place back on the parchment paper on a flat surface and allow to cool completely.
- You may not get exactly 12 layers but you should get at least 11 and no more than 13.
- Make the crumb.
- When all layers are baked, return the least attractive layer (or two if you got 12 layers out of the batter) to the oven at 250F and bake for about 15 minutes or until reddish brown and dry. Allow the layer(s) to cool and use a food processor to process into fine crumbs. Set aside.
- Two layers is plenty of crumb. If you got 13 layers and want to make an 11-layer cake, that works too.
- When all layers are baked, return the least attractive layer (or two if you got 12 layers out of the batter) to the oven at 250F and bake for about 15 minutes or until reddish brown and dry. Allow the layer(s) to cool and use a food processor to process into fine crumbs. Set aside.
- Make the cream
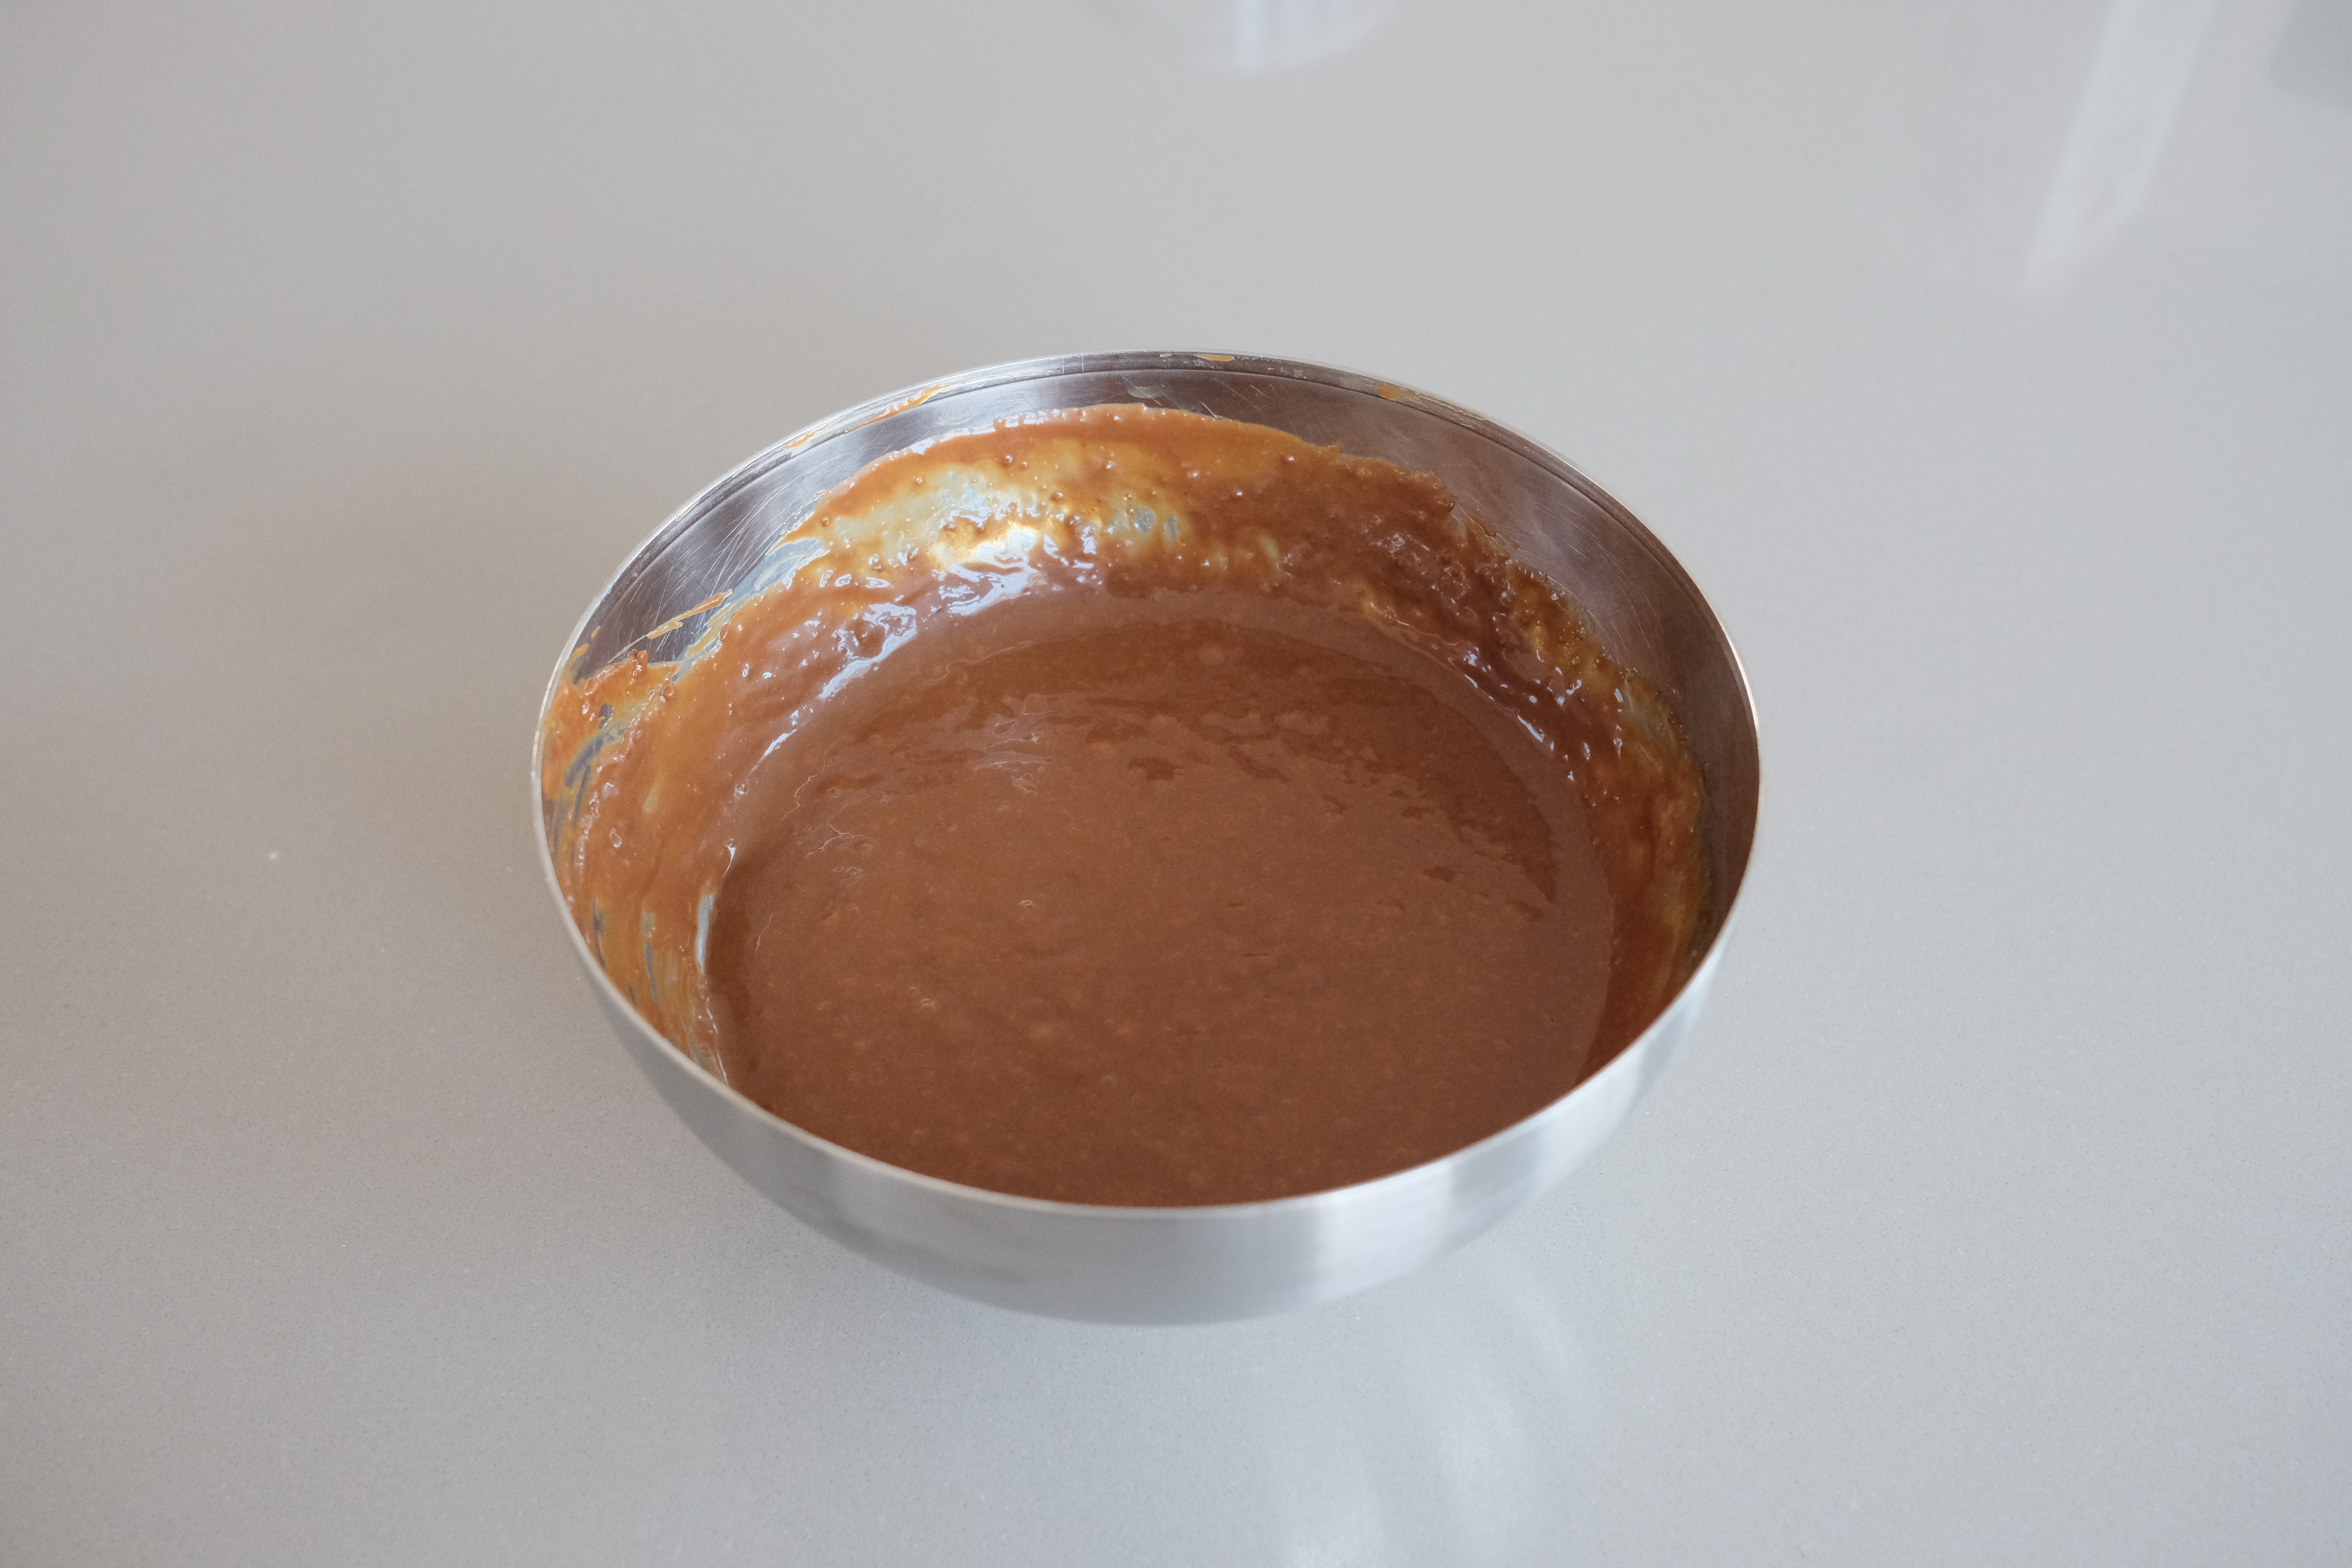
- Place the remaining 1/2 cup of burned honey (about 6 ounces), the can of dulce de leche, and 1 teaspoon kosher salt into a medium bowl. Whisk by hand until combined, then pour in 3/4 cup of chilled cream and mix until homogenous. Chill until completely cooled.

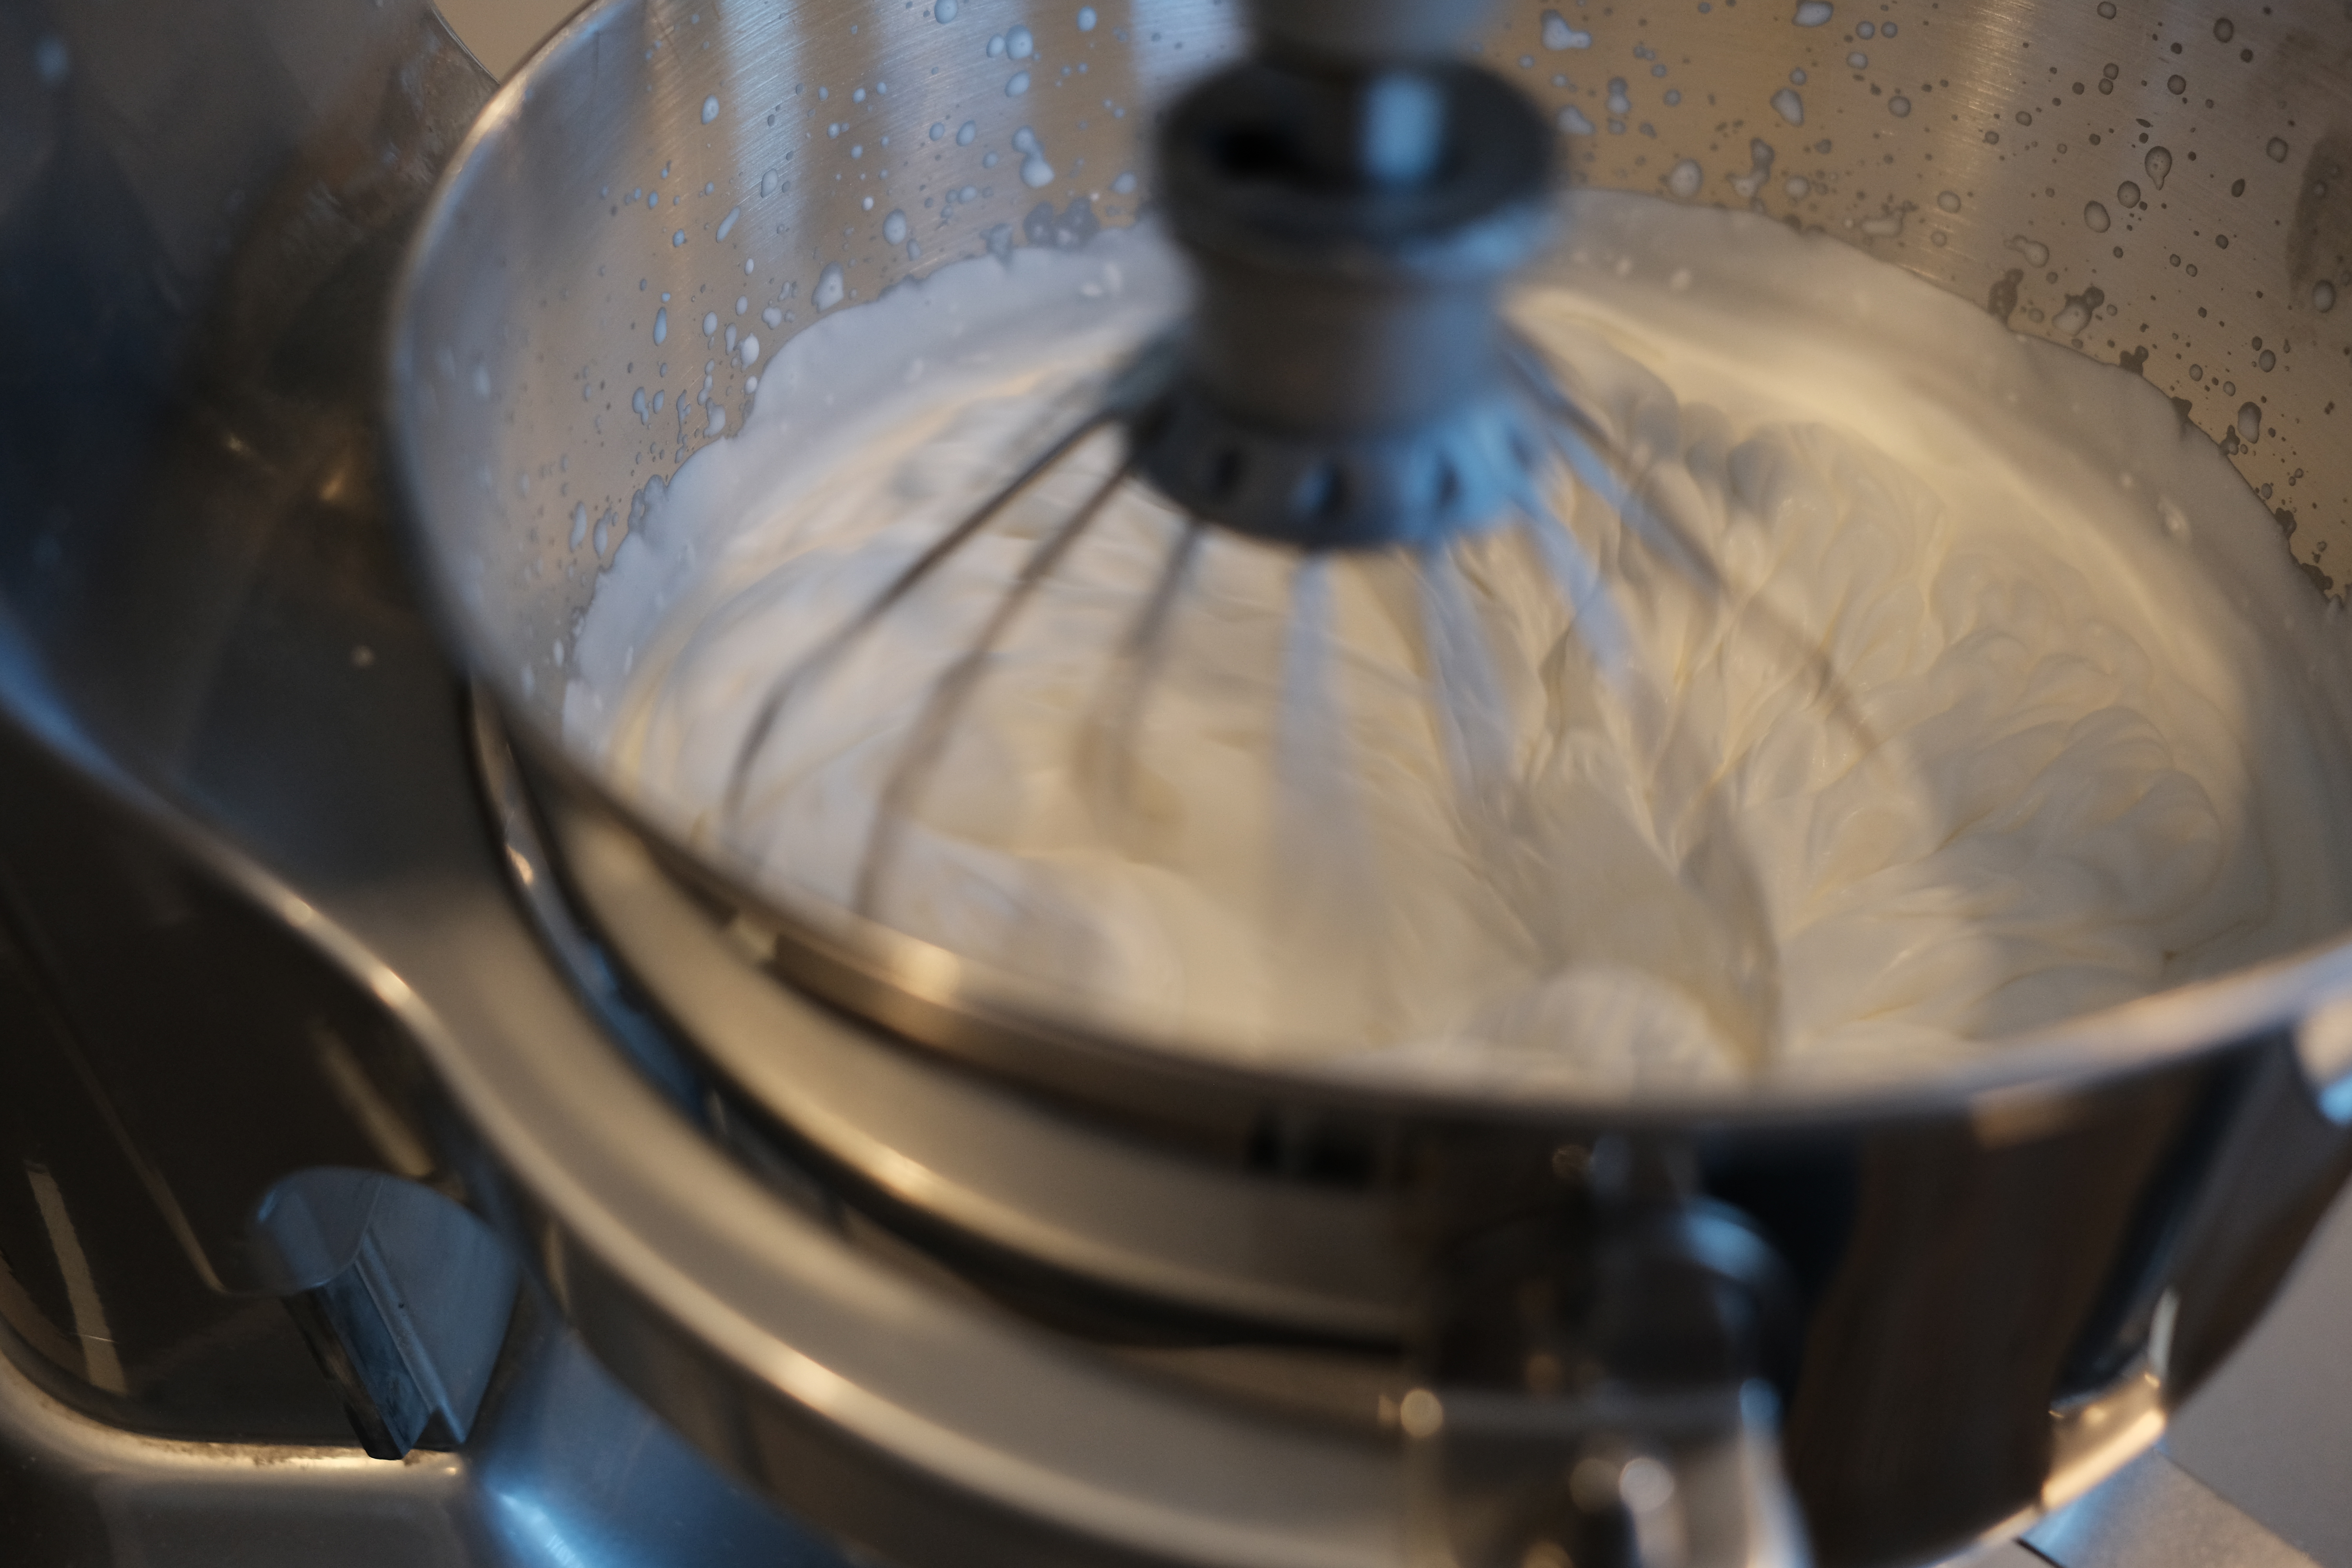
- Place 4 cups of chilled cream into the bowl of a stand mixer and whisk with the whisk attachment at medium speed to soft peaks, around 6 minutes.

- Add the honey and dulce de leche mixture to the cream and whip to medium stiff peaks.

- Place the remaining 1/2 cup of burned honey (about 6 ounces), the can of dulce de leche, and 1 teaspoon kosher salt into a medium bowl. Whisk by hand until combined, then pour in 3/4 cup of chilled cream and mix until homogenous. Chill until completely cooled.
- Complete! You should now have the 3 elements necessary for construction:
- 10 cake layers, cooled
- Burnt honey cream
- Crumbs


Construction
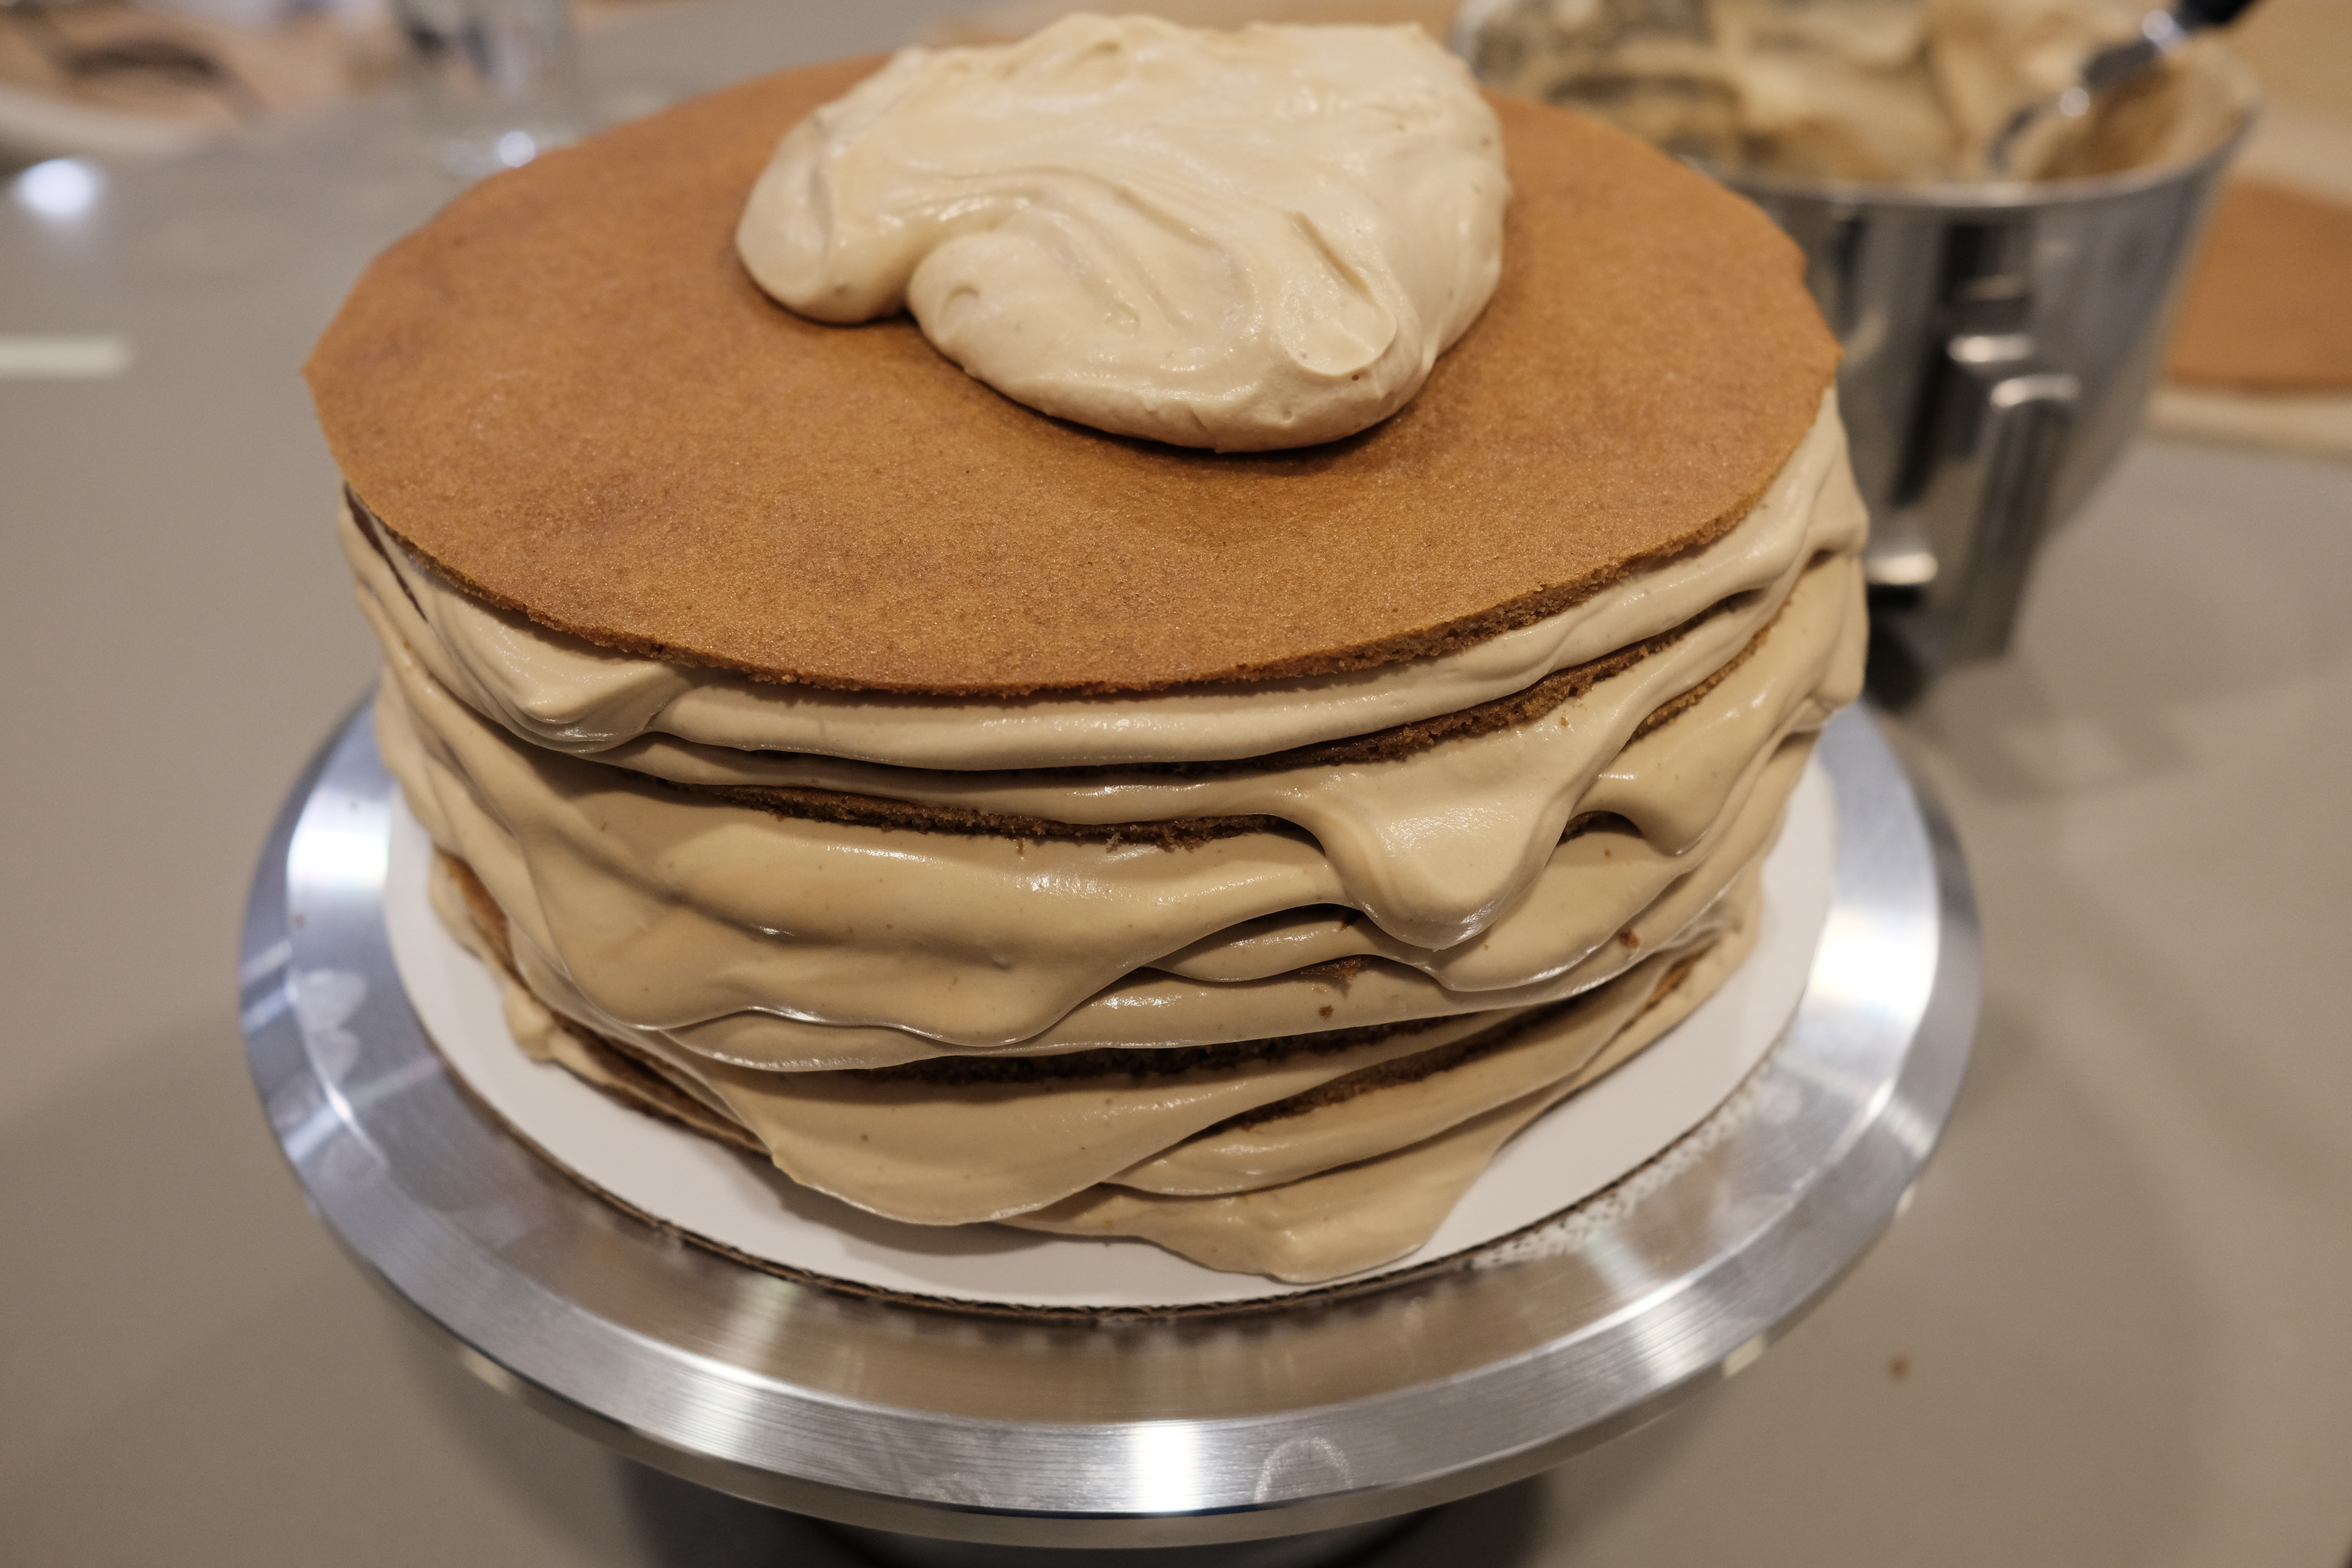
- Place a cake layer on the center of a 10″ cardboard circle.
- Add a heaping cup of cream and spread evenly around the cake.
- Feel free to spread right to the edge and even a little over. Any extras running down the side will just make frosting the side easier in a little bit.
- Place a cake layer and center it.
- Repeat steps 2 and 3 until all 10 cake layers are used up.

- If the center starts to dome, don’t be afraid to push down a bit to make the layers as level as possible.
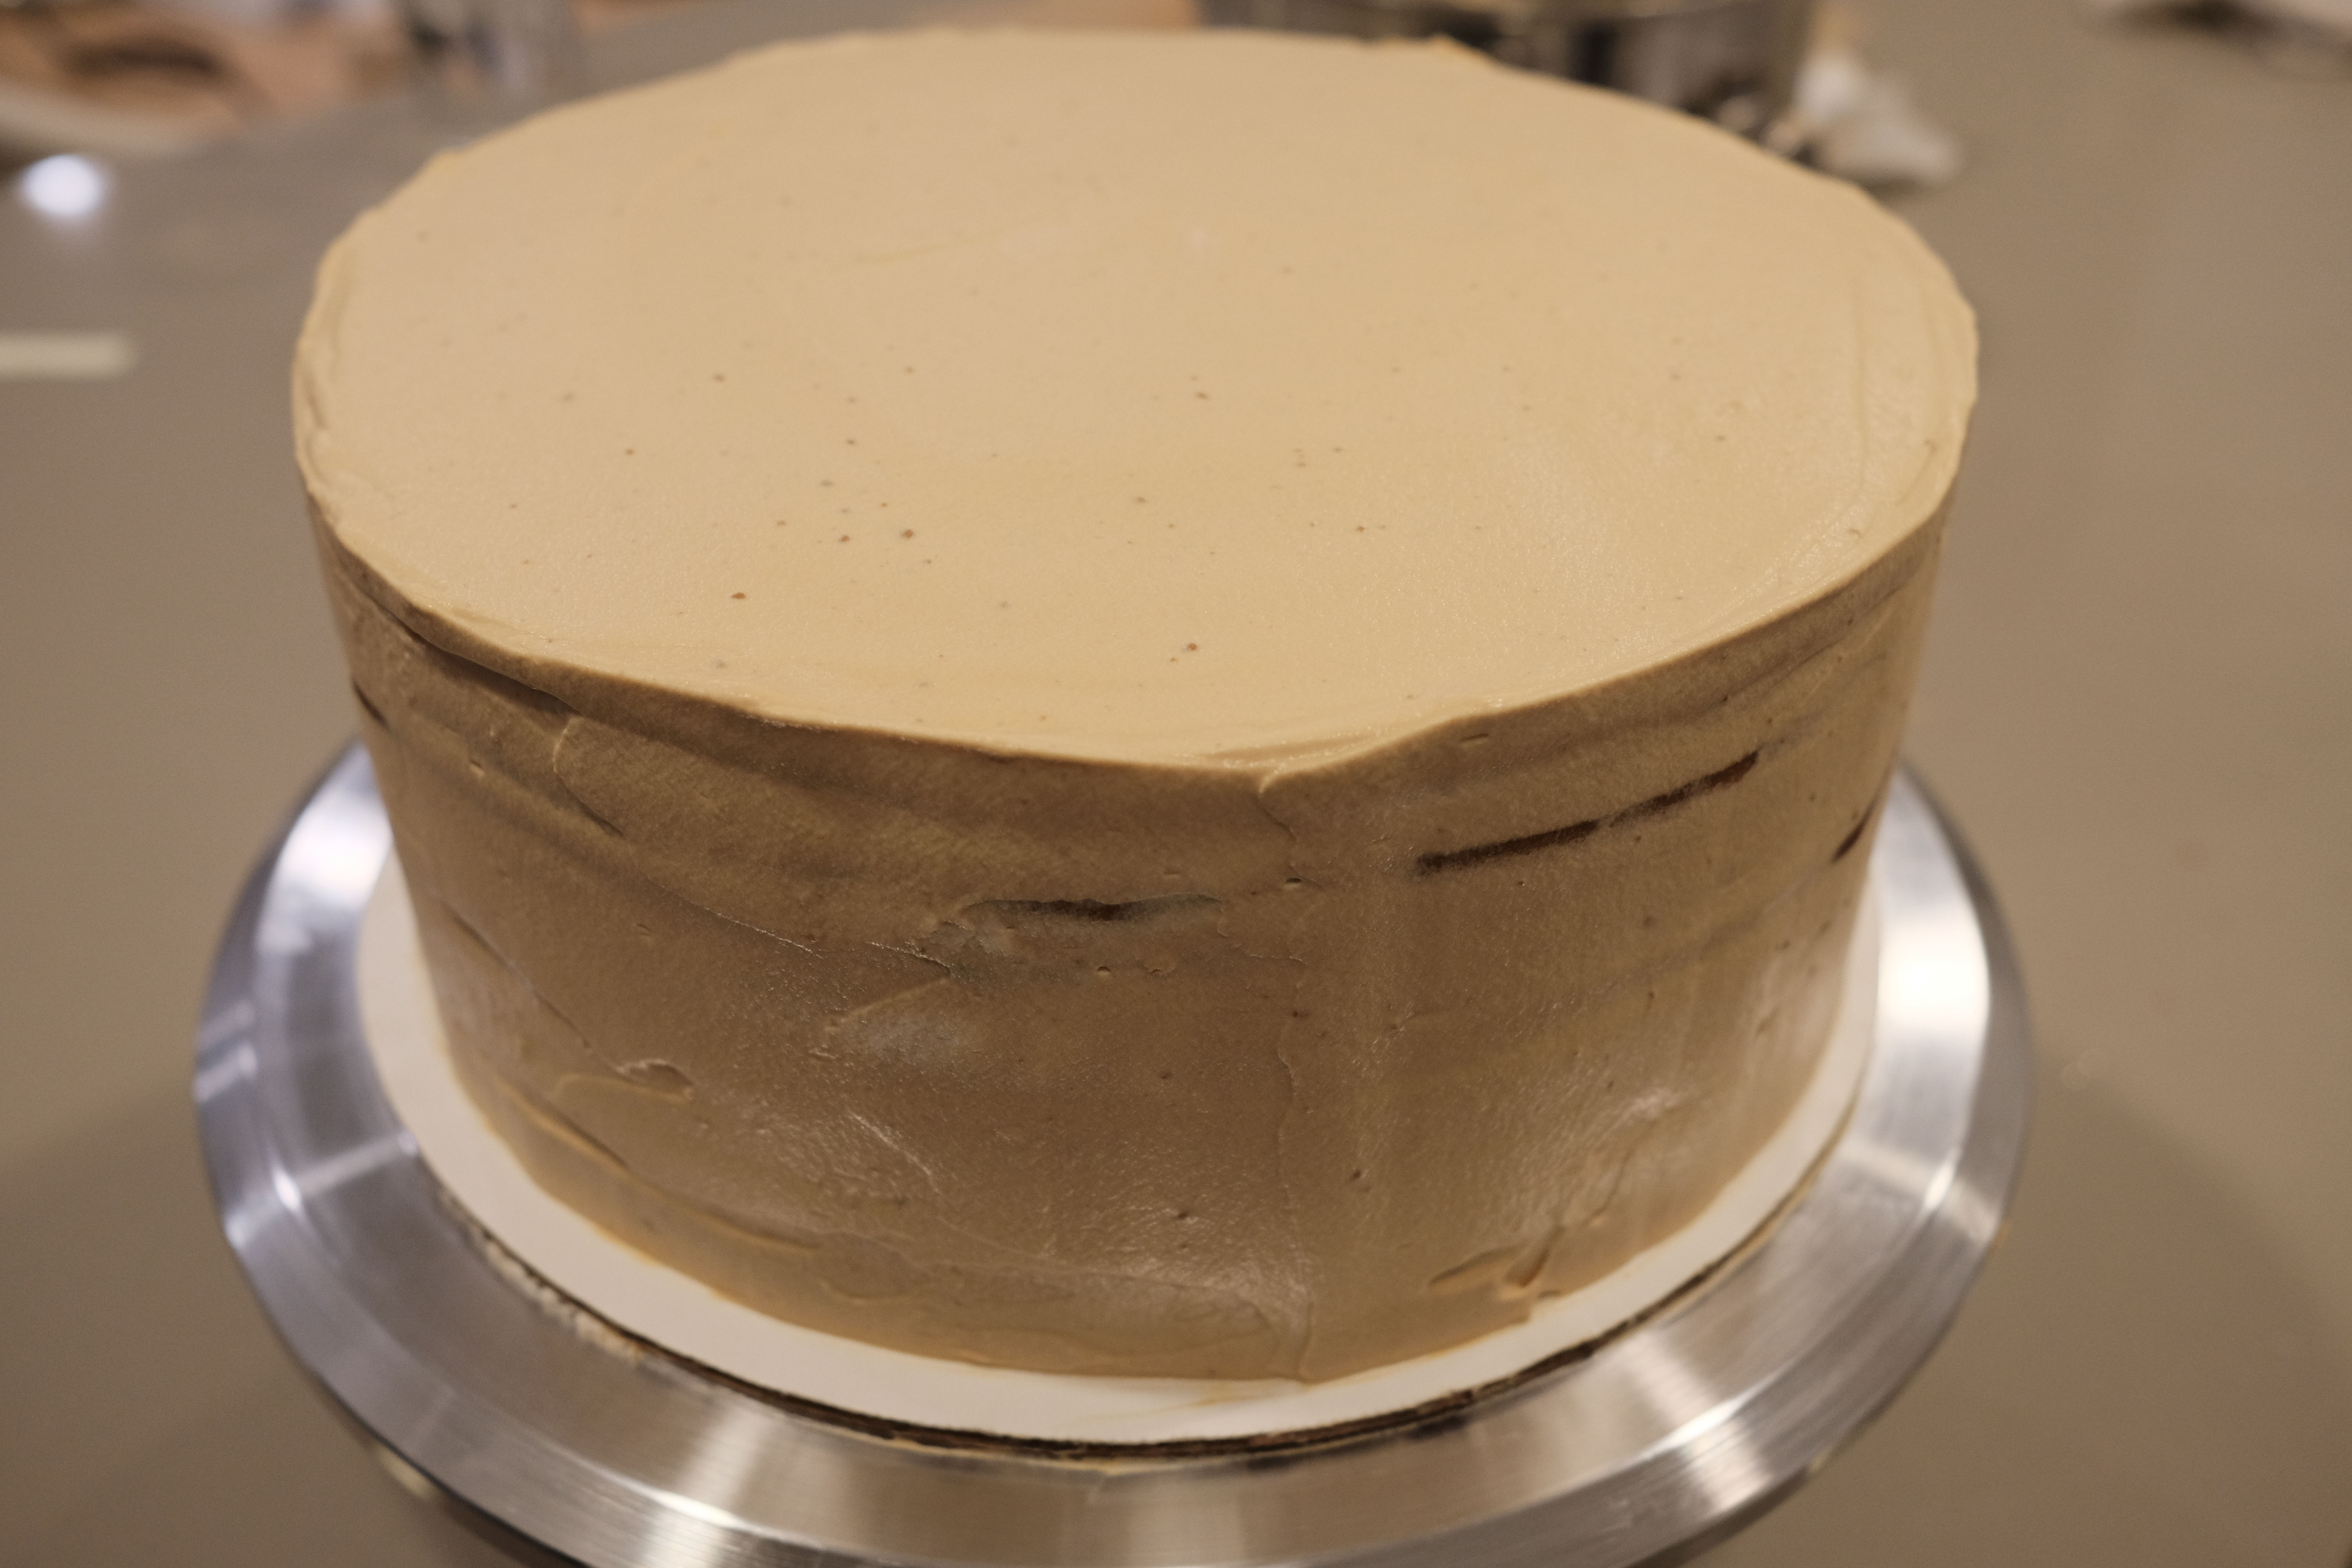
- Once all layers are used up, use remaining frosting to frost the top of the final layer as well as the side.
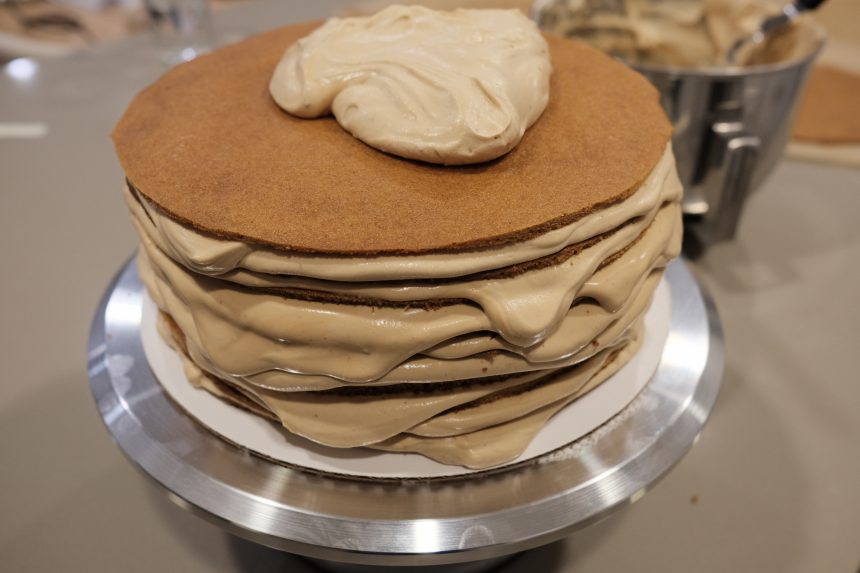
- Remember the extra frosting running off the side in step 2.1? That’ll make frosting the sides very easy.
- You do not need to hide the cake completely on the side. Just smooth out the frosting and don’t worry about any bits of cake poking through.

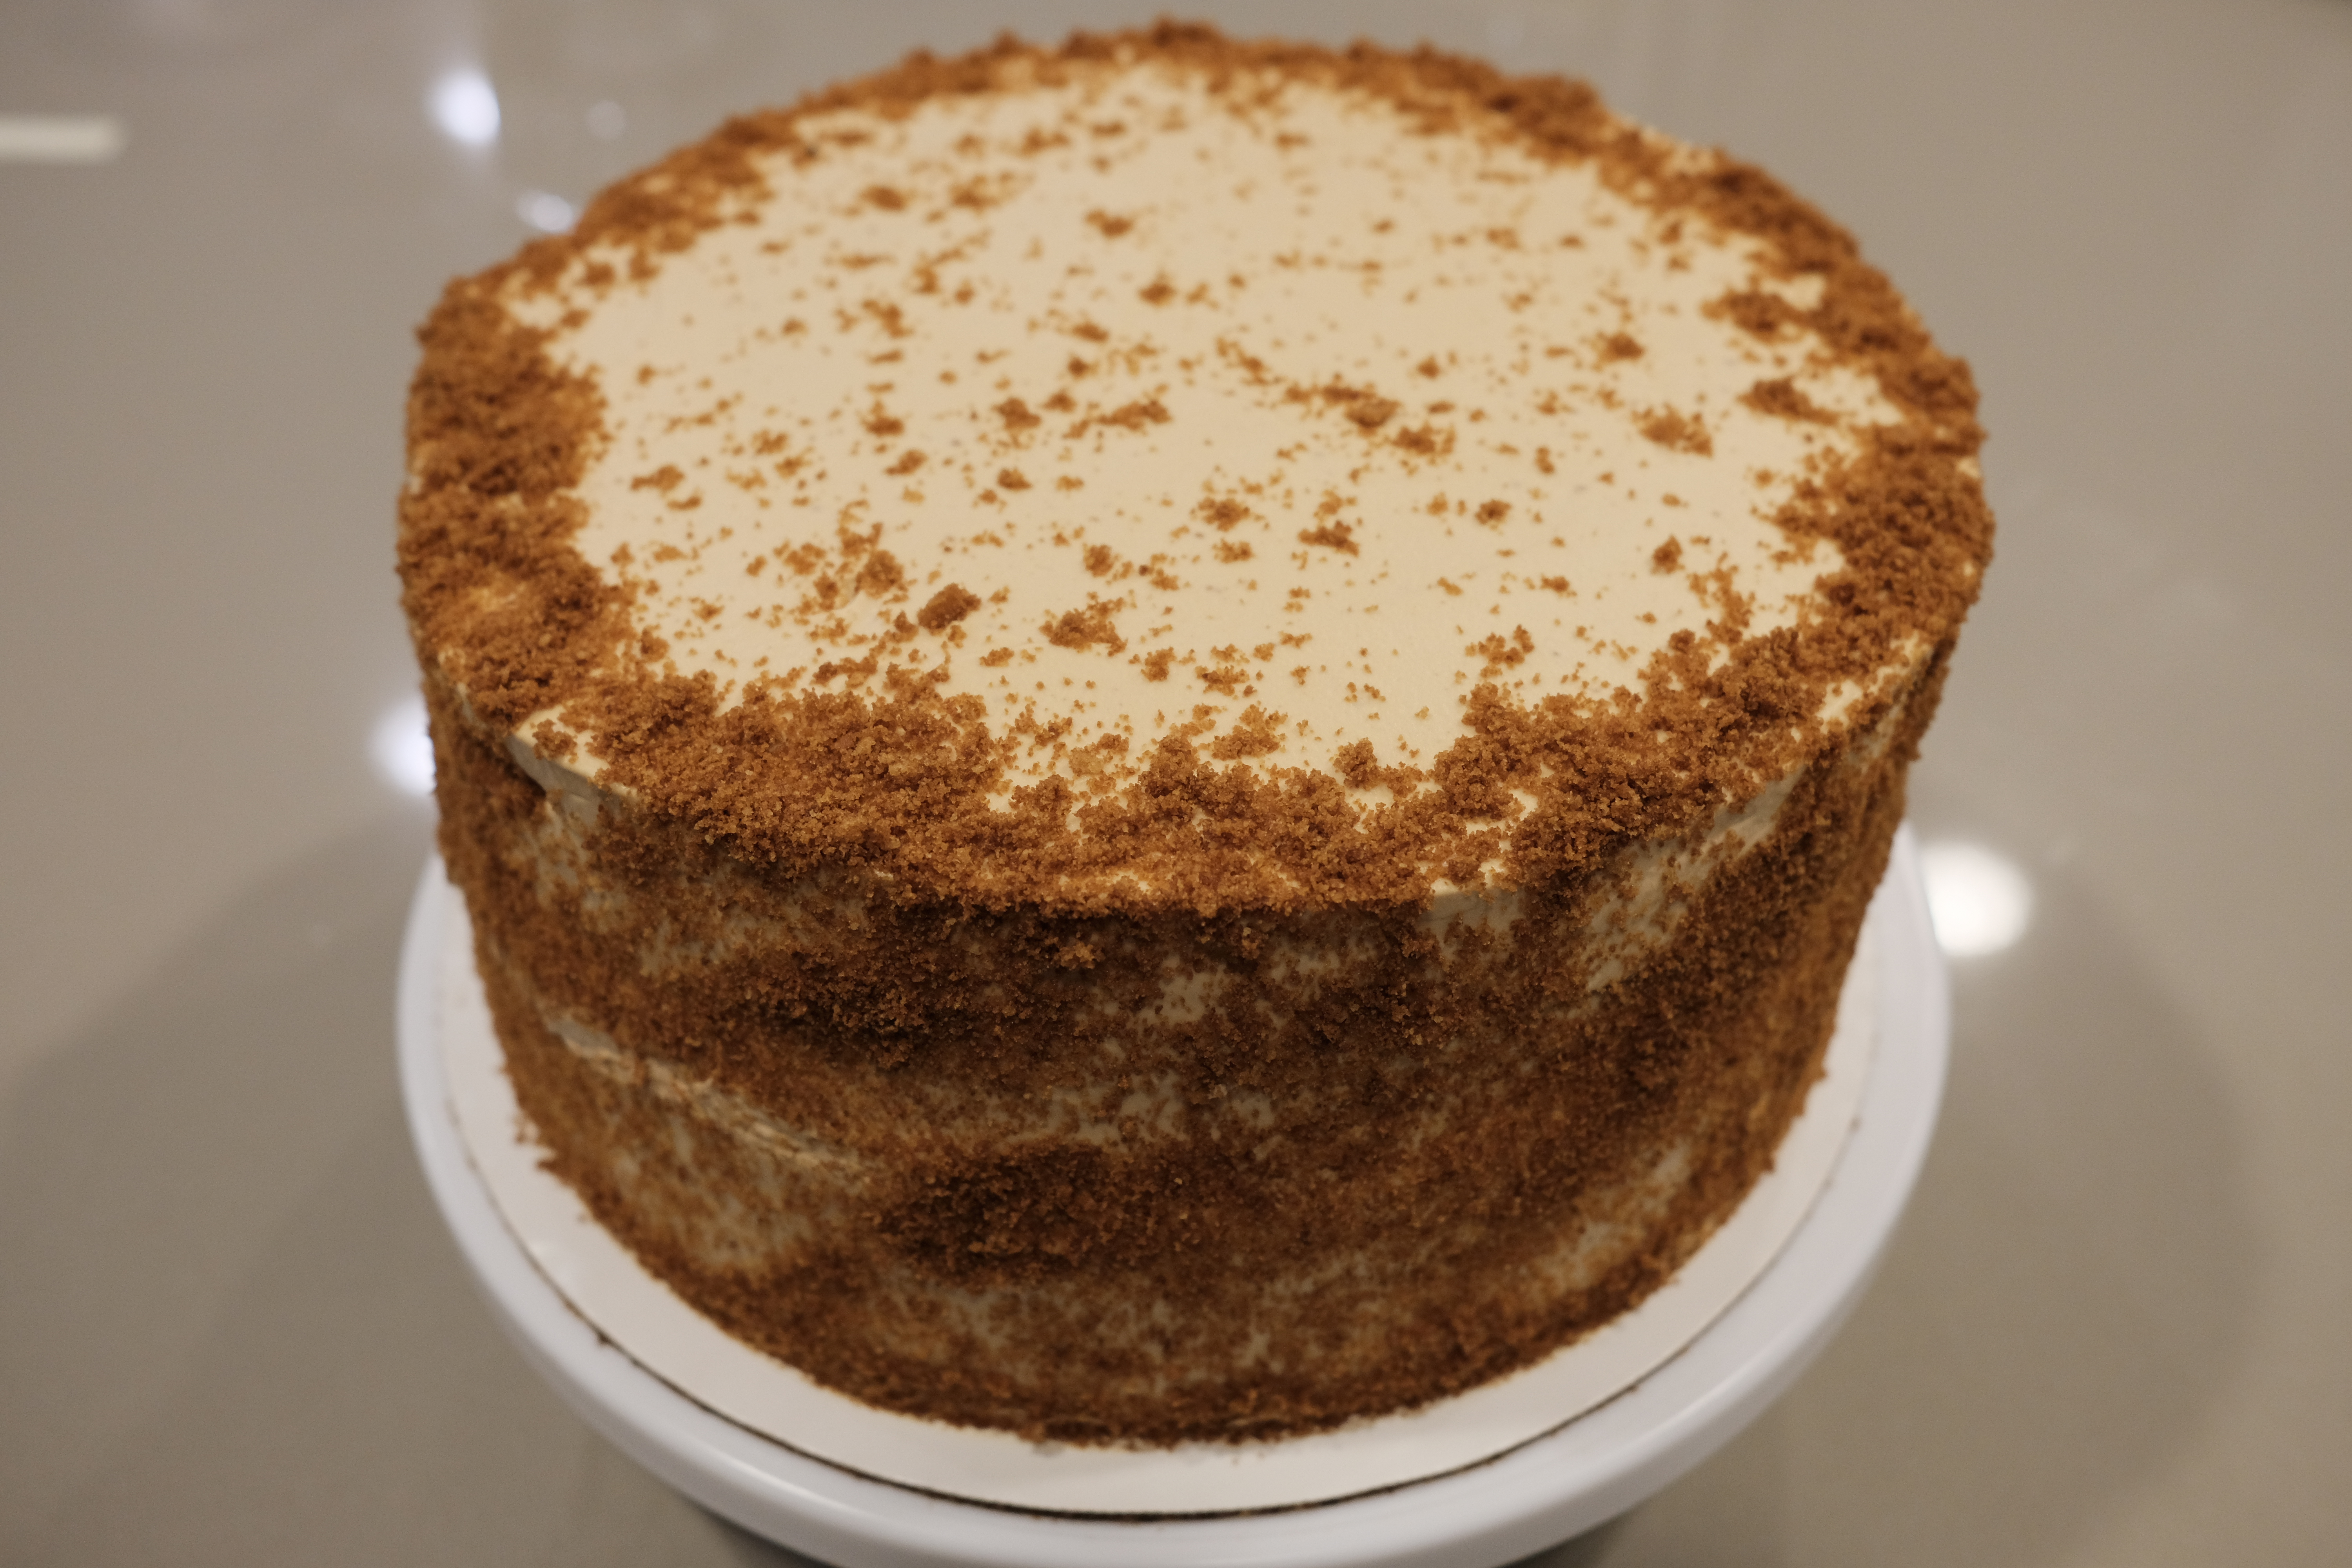
- Coat the cake with crumbs. There are a couple of ways to do this but whichever you do save yourself some clean up trouble and do this with the cake sitting on a baking pan otherwise you will have delicious crumbs everywhere.
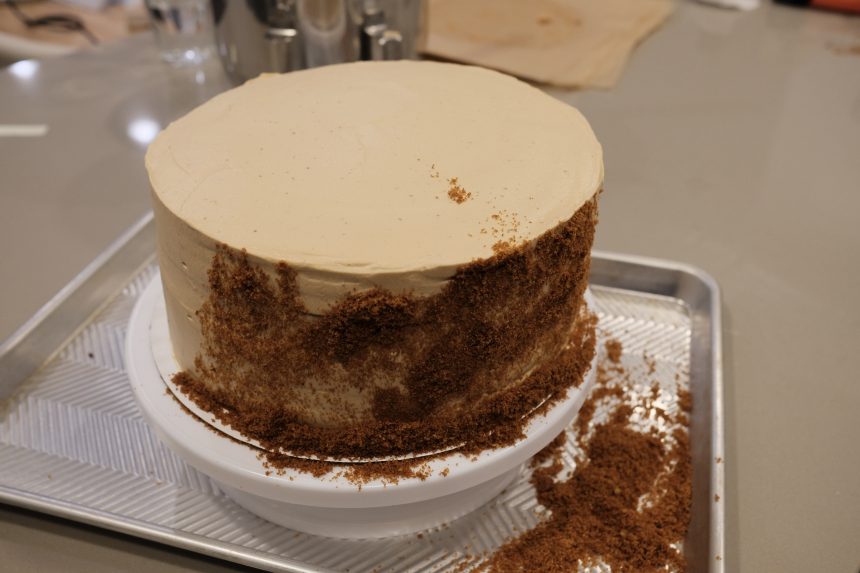
- Just sprinkle some crumbs around the side but don’t worry about covering everything evenly.
- Try to get an even coat of crumbs over the sides of the cake and a small ring around the outer edge of the top layer. This requires a lot of patting crumbs into frosting which is annoying but the effect is nice. I tend to do this and then sprinkle a very light uneven coating of crumbs on the top.
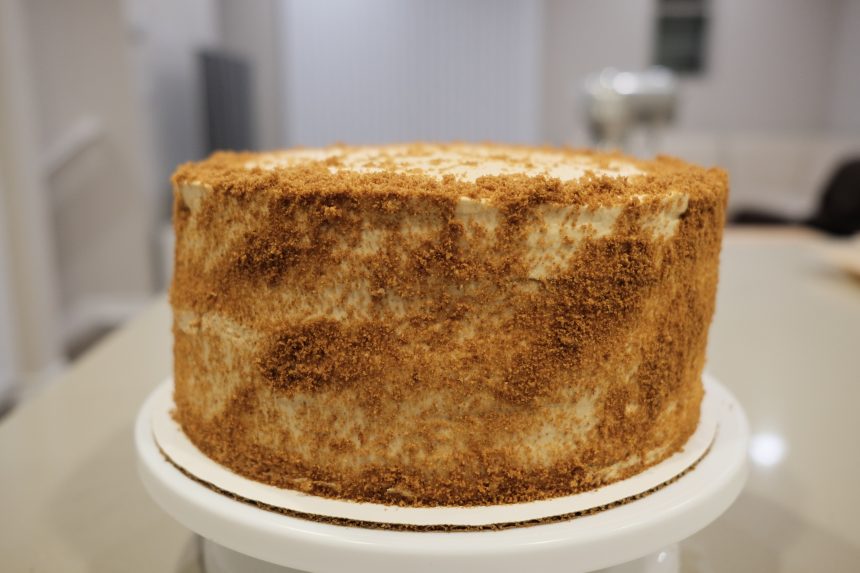
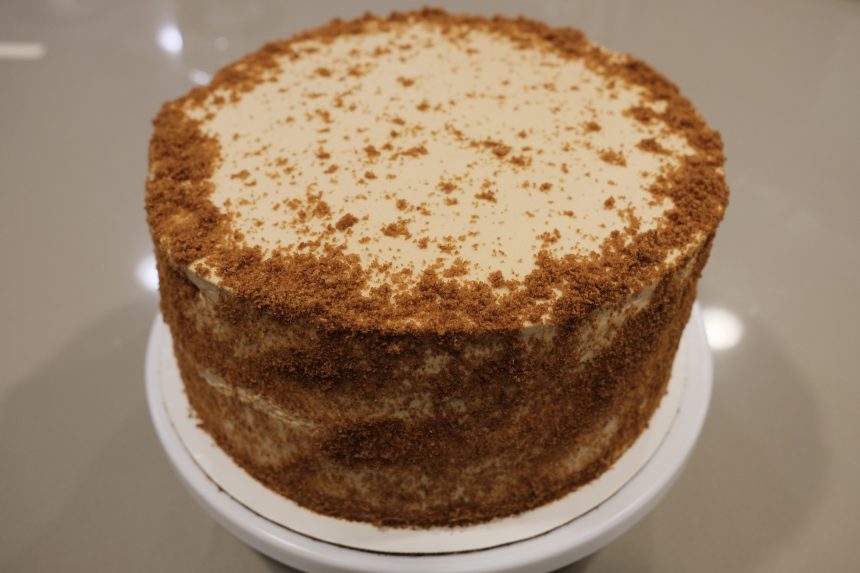
- Full even coat of crumbs.
- Chill overnight (for at least 8-12 hours ideally) before serving.
- Cake can be made two days in advance and leftovers will keep in the fridge for up to 3 days, ideally in an airtight container.


Serving
Since this cake looks amazing when sliced, a note about serving.
For best result, use a sharp knife that’s been sitting in tepid water and rinse the knife in water (and clean off cream) between each slice. This slows things down, especially if you’re cutting a lot of slices at a time, but if you don’t take care to have a clean knife with each cut the cream and cake will stick to your knife and you’ll lose the visual impact of those 20 gorgeous alternating layers.
Also, again, this is a very rich and tall cake so cut very thin layers and lay each slice horizontally on a plate. Don’t be afraid to use your hands to guide the slice out lightly and on to the plate.
Optimization and Pessimization
Pessimization
There’s not a lot to pessimize here. Baking it one layer at a time is extremely time consuming but obviously possible. If your mixer is very small, you can do the cream in two batches. If you don’t have an handheld electric mixer, you can cramp up your shoulders doing things by hand.
Optimization
The whole point of this post originally was going to be about optimization and there’s actually quite a lot of parallelization possible. Stay tuned for a full diagram and even more words.
Bibiliography:
- https://www.sfgate.com/recipes/article/Hot-treats-at-20th-Century-Cafe-Krasinski-torte-5937846.php
- https://www.chowhound.com/food-news/153065/20th-century-cafes-russian-honey-cake-in-animated-gifs/
- https://www.nytimes.com/2017/12/14/magazine/secrets-russian-honey-cake-michelle-polzine.html